
- Requirements
- Step 1. Enable Adobe IMS
- Step 2. Set up the Admin UI SDK
- Step 3. Verify App Management
- Step 4. Acquire M2E Multichannel from Adobe Exchange
- Step 5. Create an environment
- Step 6. Configure and deploy the environment
- Step 7. Associate the app with Adobe Commerce
- Step 8. Install M2E Multichannel
- Need help?
This guide explains how to acquire, deploy, and install M2E Multichannel for Adobe Commerce PaaS.
PaaS refers to Adobe Commerce on cloud infrastructure and Adobe Commerce on-premises.
M2E Multichannel is distributed as a non-downloadable Adobe App Builder application. You do not need to download the application source code or deploy it locally using Adobe I/O CLI.
💡 Video tutorial: Watch the M2E Multichannel installation walkthrough for Adobe Commerce PaaS
Requirements #
Before getting started, make sure you have:
- Adobe Commerce 2.4.5 or later installed and running.
- Access to Adobe Exchange.
- Access to the Adobe account and organization associated with your Adobe Commerce environment.
- Administrator access to Adobe Commerce Admin.
- Permission to acquire, deploy, associate, and install App Builder applications.
ℹ️ M2E Multichannel uses Adobe IMS authentication for Adobe Commerce PaaS. Commerce Integration (OAuth 1.0a) authentication is not supported.
Step 1. Enable Adobe IMS #
Adobe IMS must be enabled for the PaaS Commerce environment before M2E Multichannel can use IMS authentication.
To enable Adobe IMS, run the following commands from the Adobe Commerce application root directory:
php bin/magento admin:adobe-ims:enable
php bin/magento cache:flush
When prompted, provide your Organization ID, Client ID, and Client Secret, and confirm that 2FA is enabled for your Adobe organization. Adobe Commerce 2.4.5 and later includes the IMS metapackage, but the integration must be configured before use.
💡 Follow Adobe's Commerce Admin integration with Adobe ID setup for instructions on configuring Adobe IMS.
Step 2. Set up the Admin UI SDK #
M2E Multichannel requires App Management and the Admin UI SDK to be available in your Adobe Commerce environment.
Adobe Commerce 2.4.8 and later #
The Admin UI SDK and App Management are included automatically. No additional installation is required.
Adobe Commerce 2.4.5–2.4.7 #
Install Admin UI SDK 3.3 or later from the Adobe Commerce application root:
composer require magento/commerce-backend-sdk:^3.0

php bin/magento module:enable \
  Magento_AdminUISDK \
  Magento_AdobeIms \
  Magento_AdminAdobeIms

php bin/magento setup:upgrade
php bin/magento setup:di:compile
php bin/magento cache:flush
💡 For more information, see the Adobe Admin UI SDK installation guide.
Enable the Admin UI SDK #
Once the SDK is available:
1) Go to Stores > Settings > Configuration.
2) Open Adobe Services > Admin UI SDK.
3) Set Enable Admin UI SDK to Yes.
4) Save the configuration.
Step 3. Verify App Management #
Once IMS and the Admin UI SDK are configured, make sure Apps > App Management is available in your Adobe Commerce Admin.
App Management is where you will associate and install the deployed M2E Multichannel application.
Step 4. Acquire M2E Multichannel from Adobe Exchange #
1) Sign in to Adobe Exchange.
2) Under Experience Cloud, find M2E Multichannel for Adobe Commerce Cloud.
3) Open the app page and click Acquire.
4) A message will appear indicating that the app requires Adobe App Builder. Click Yes, continue to proceed.
5) Once the app is acquired, click Manage your app.
You will be redirected to the app management page in Adobe Exchange.
Step 5. Create an environment #
Once the application is acquired and approved, create an environment where it will be deployed.
1) On the app management page, click the M2E Multichannel for Commerce Cloud app name.
2) Click + Add Environment.

3) Enter a name for the environment, such as Testing or Production. It must be between 3 and 10 characters long.
4) Click Save environment.
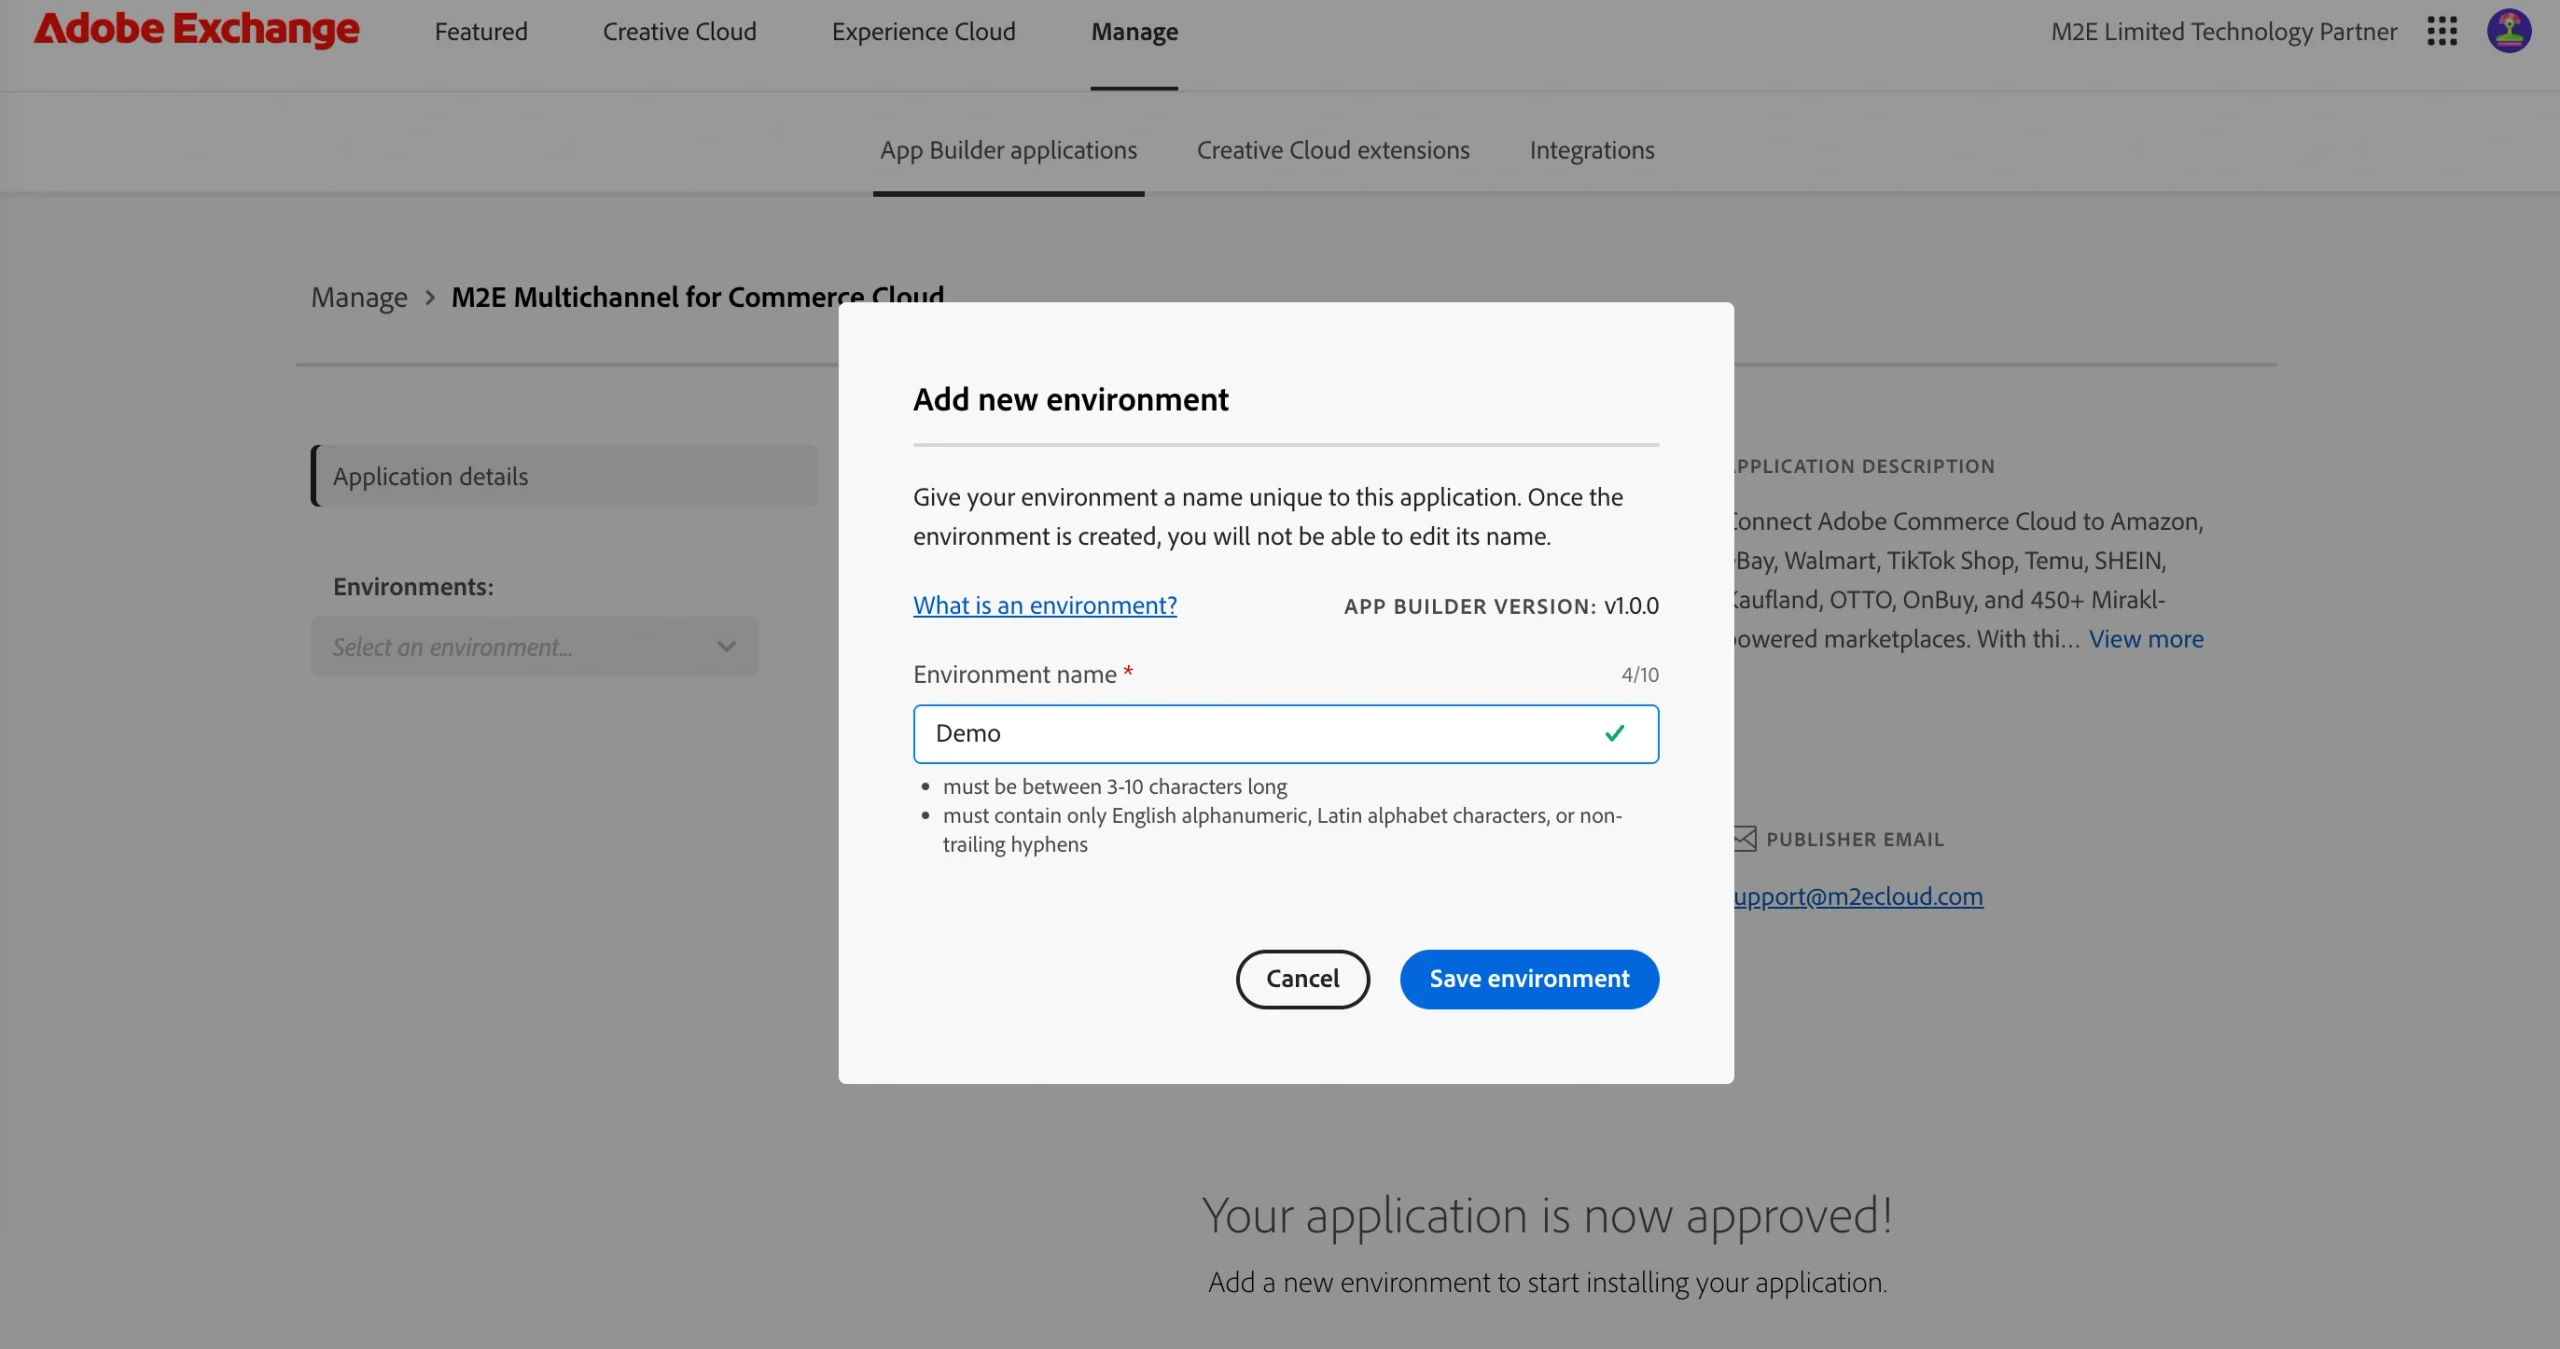
After the environment is saved, Adobe automatically creates the corresponding App Builder project in Adobe Developer Console.
Open the newly created environment to continue.
Step 6. Configure and deploy the environment #
A newly created environment has the Draft status and must be configured and deployed.
1) Open Configuration from the environment menu.

2) Select the required Product Profile.
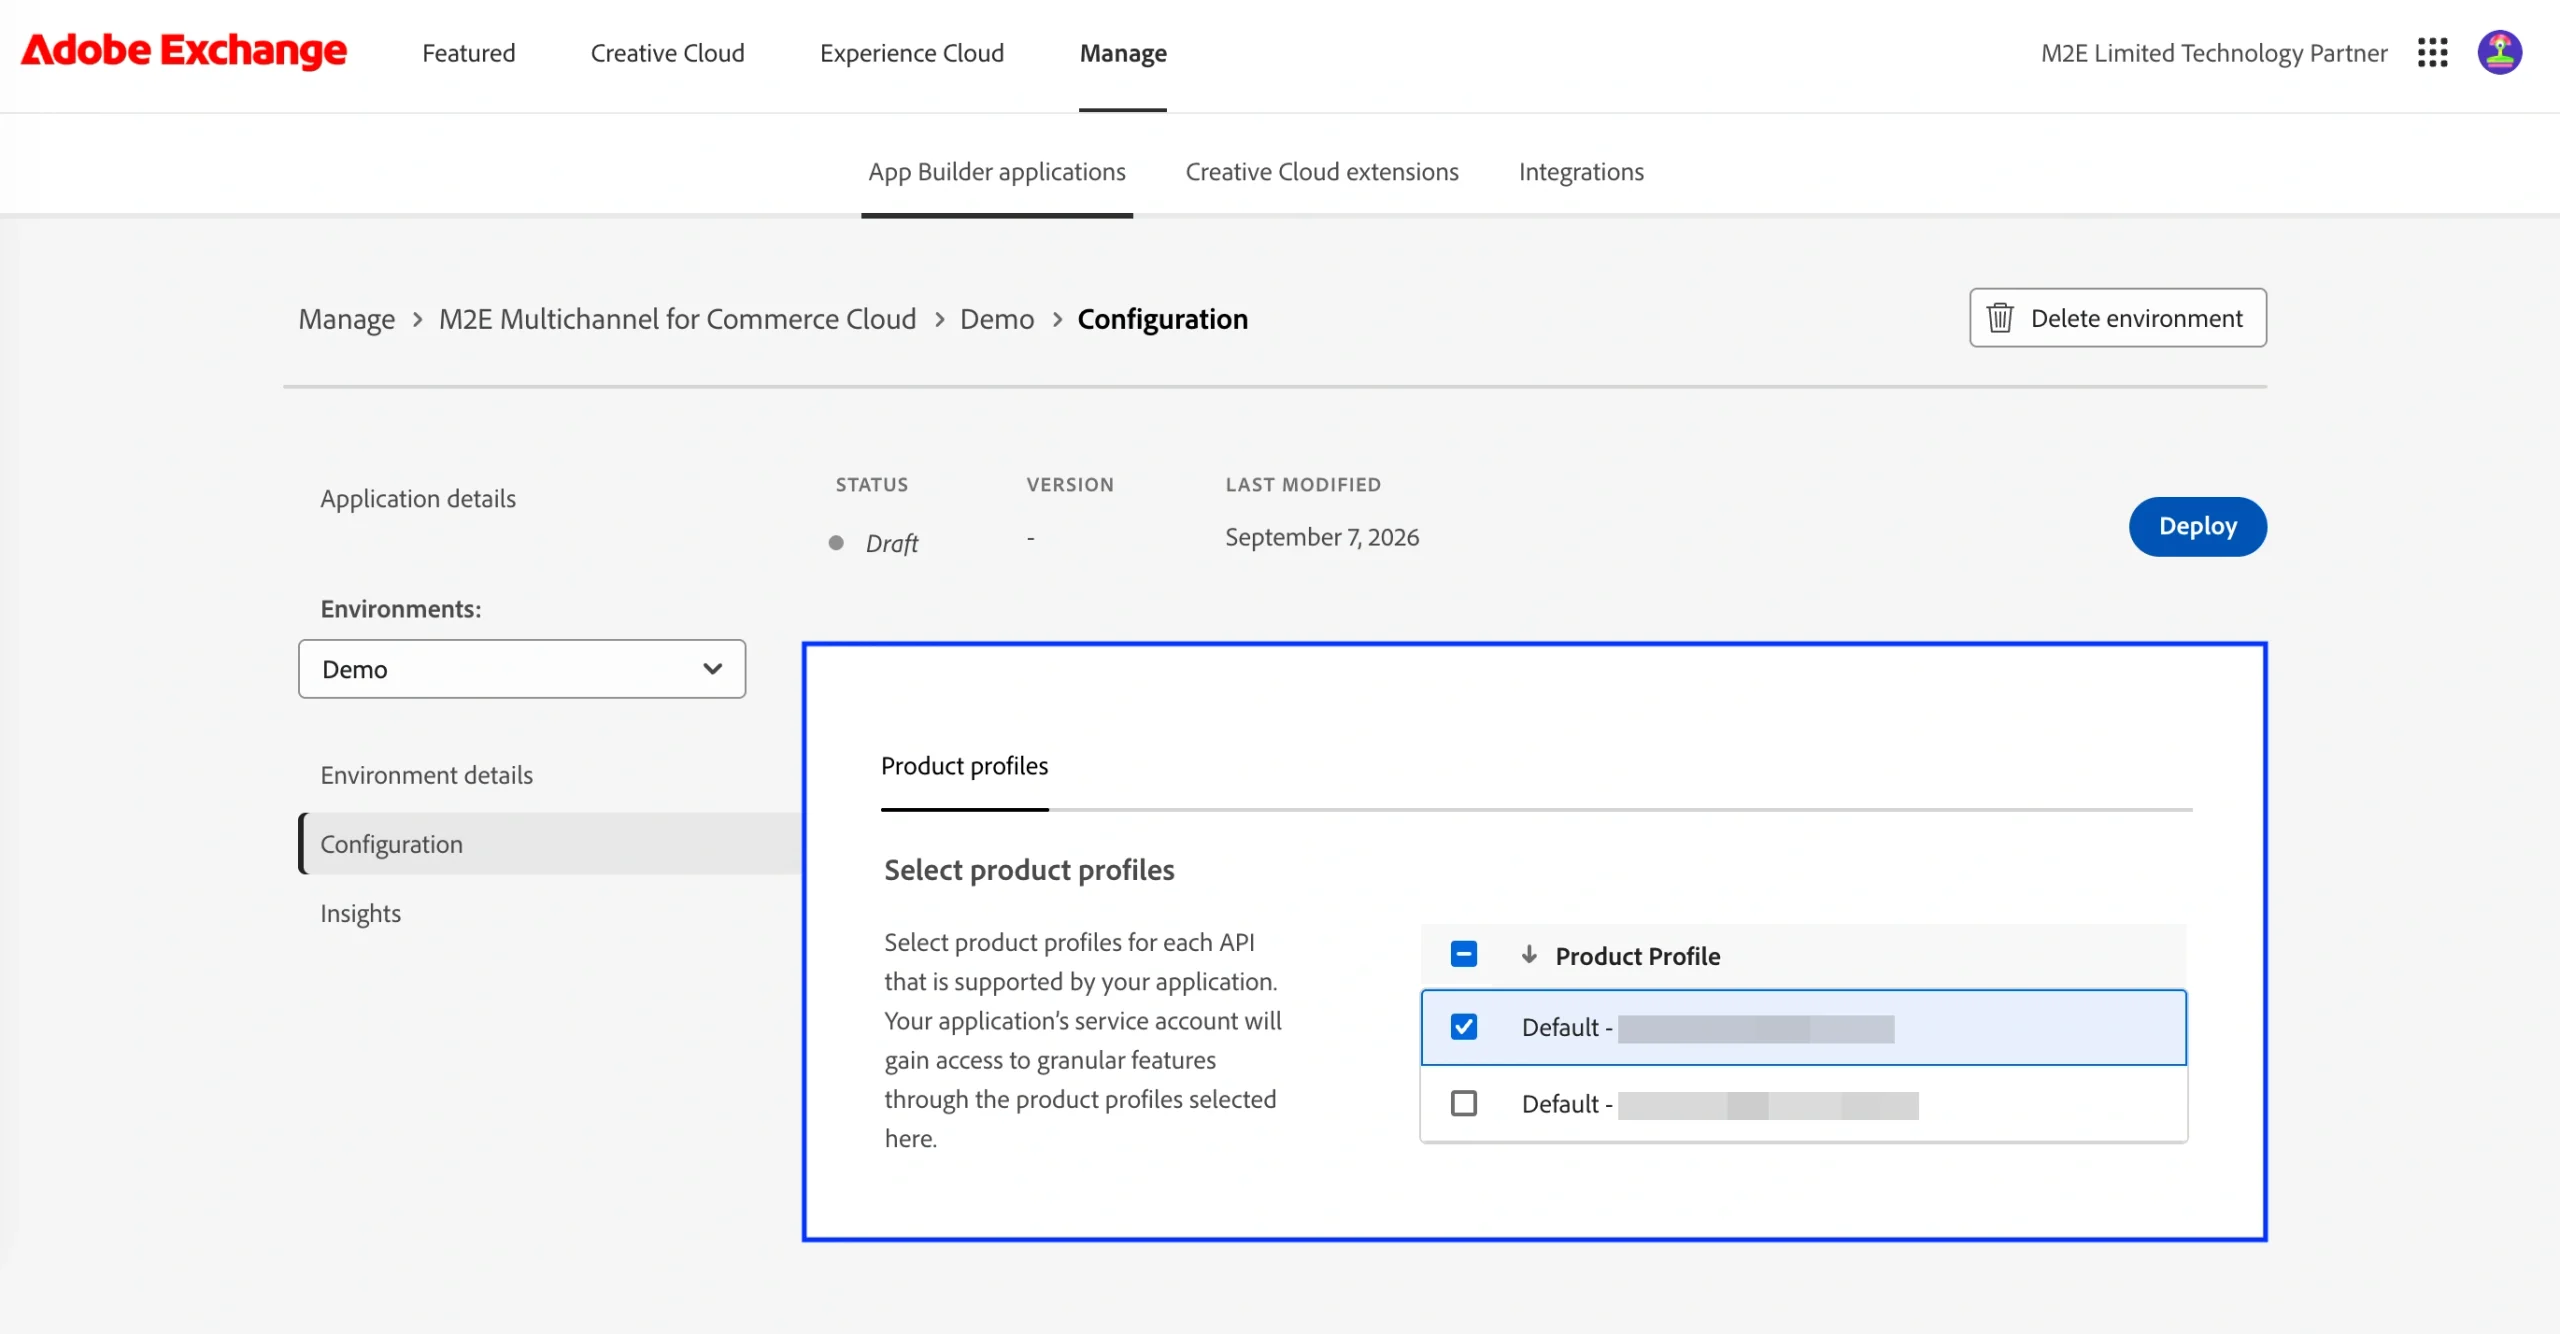
3) Click Deploy.
4) Wait for the deployment to complete.
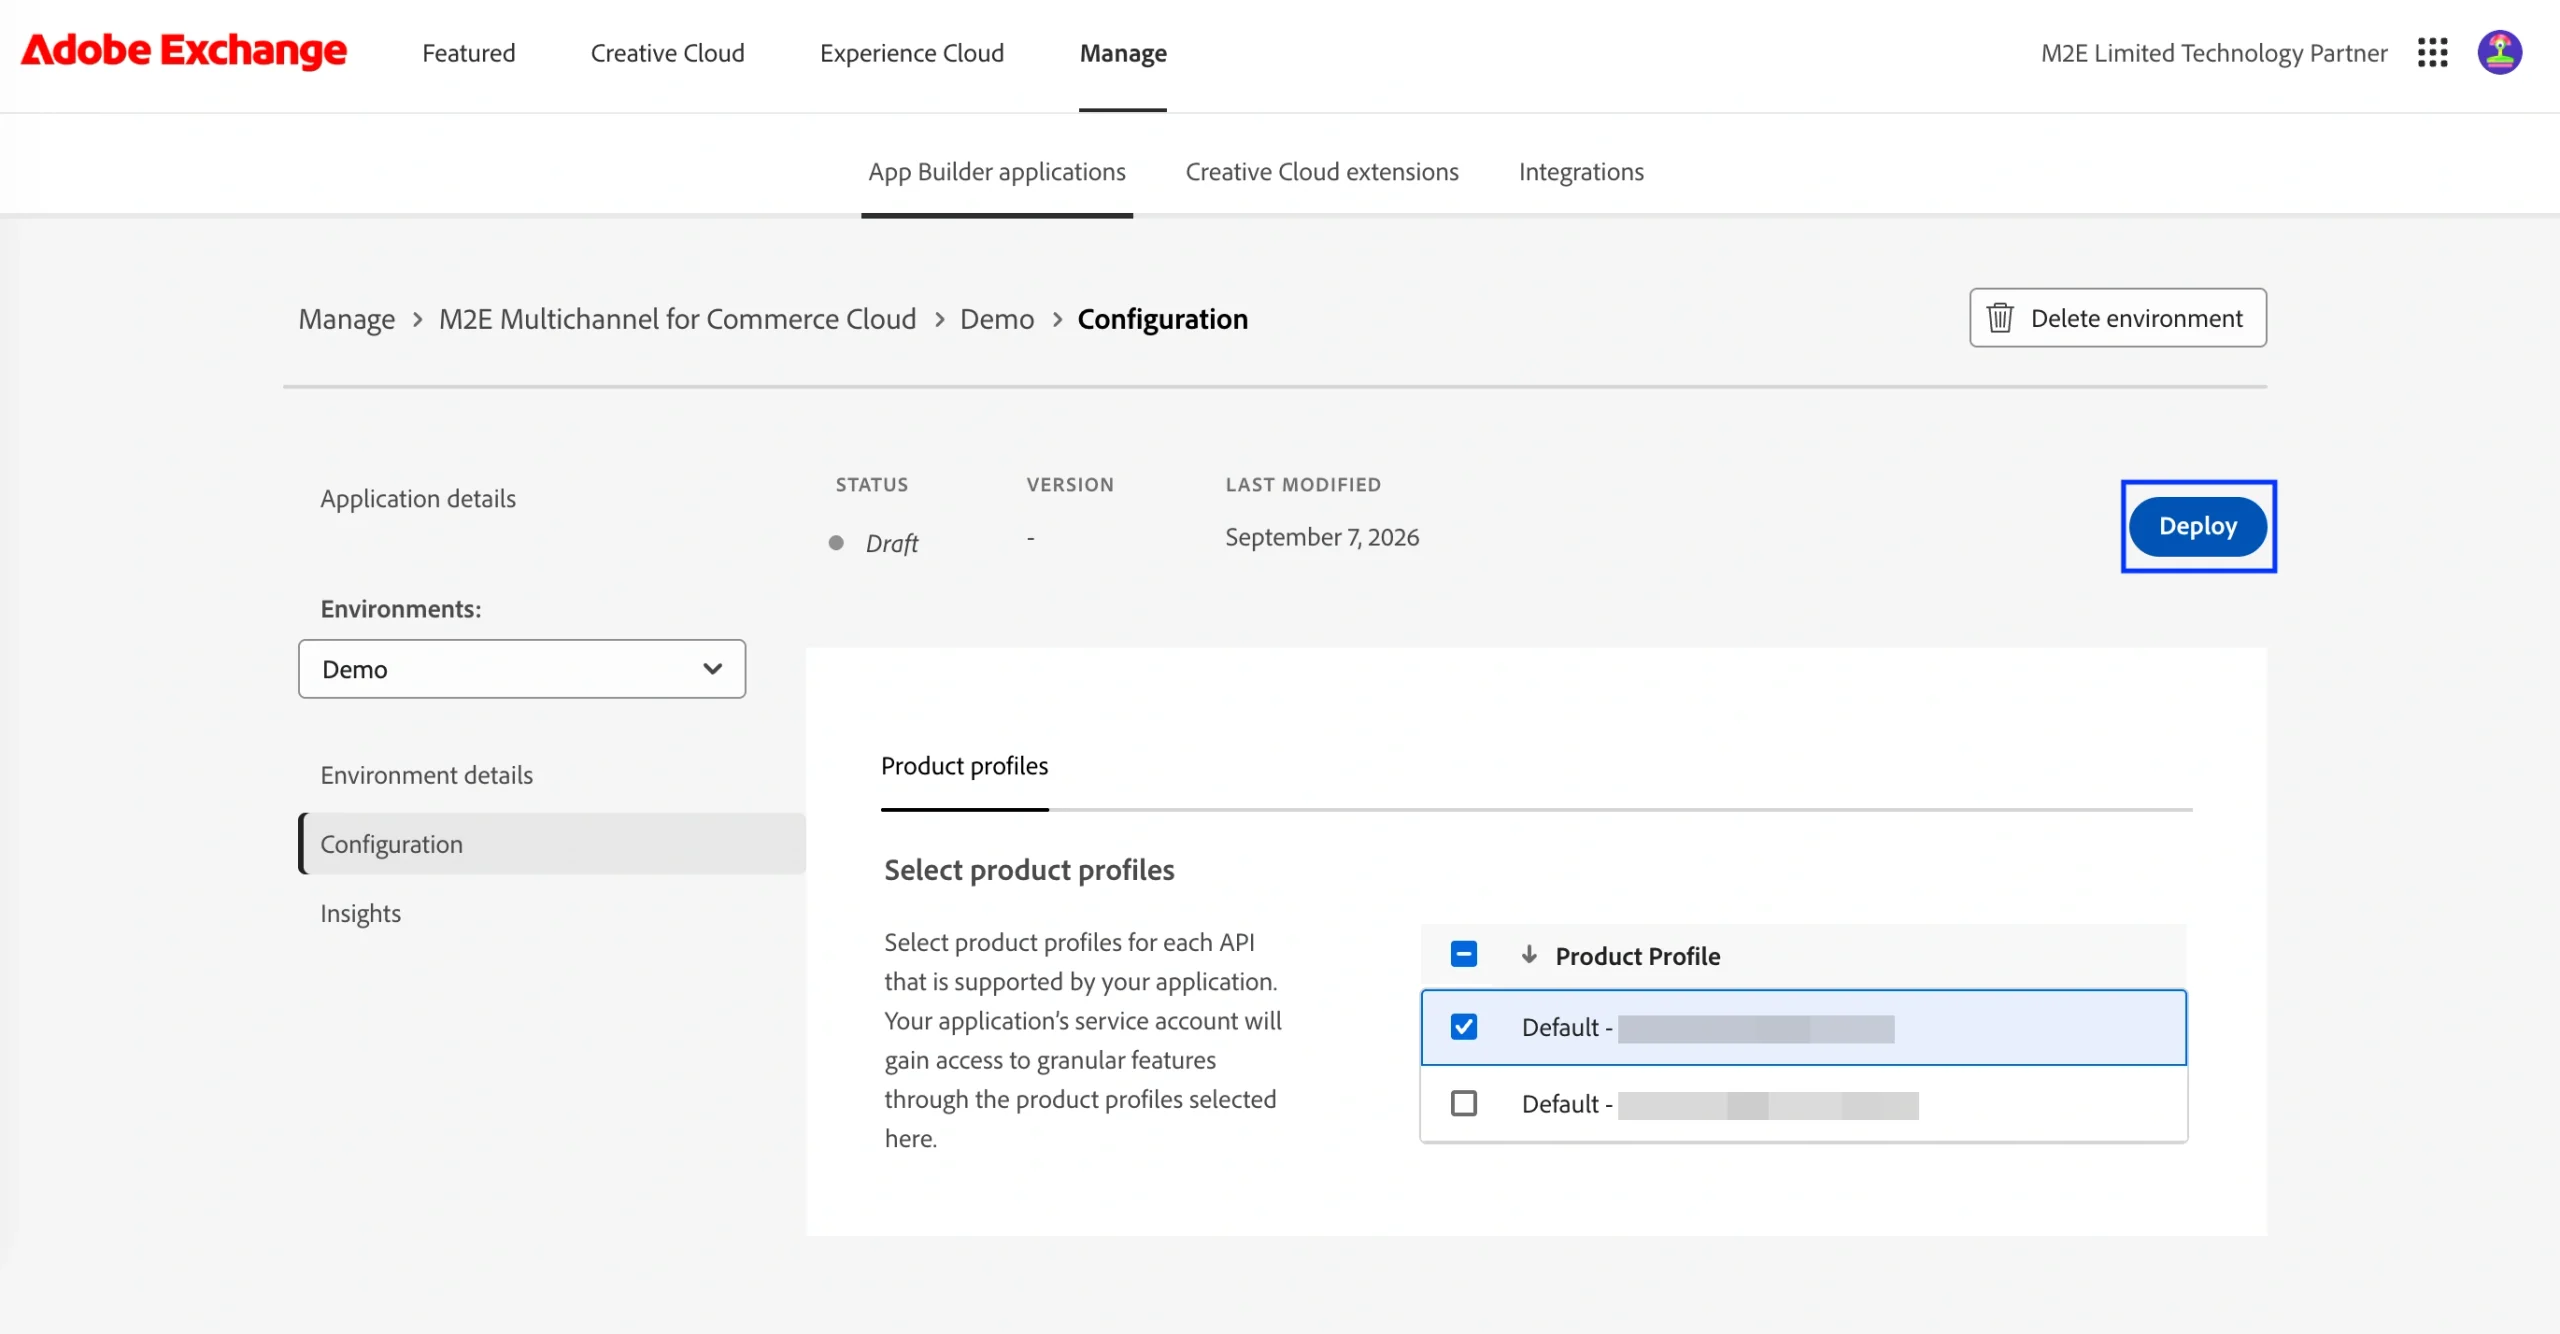
Deployment may take a few minutes. Once done, the environment status changes to Deployed.

During deployment, the required IMS authentication values are configured automatically:
| Variable | Description |
|---|---|
AIO_COMMERCE_AUTH_IMS_ORG_ID | Your Adobe organization ID. |
AIO_COMMERCE_AUTH_IMS_CLIENT_ID | Identifies your OAuth Server-to-Server credential. |
AIO_COMMERCE_AUTH_IMS_CLIENT_SECRETS | The Client Secret from the same OAuth Server-to-Server credential. |
AIO_COMMERCE_AUTH_IMS_TECHNICAL_ACCOUNT_ID | The machine identity the access token is issued for. |
AIO_COMMERCE_AUTH_IMS_SCOPES | Permissions the resulting token is allowed to use. |
💡 For more information about OAuth Server-to-Server credentials, see Adobe’s authentication documentation.
Step 7. Associate the app with Adobe Commerce #
Associate the App Builder application with your Adobe Commerce instance.
1) Sign in to your Adobe Commerce Admin.
2) Go to Apps > App Management.
3) Click + Associate App.
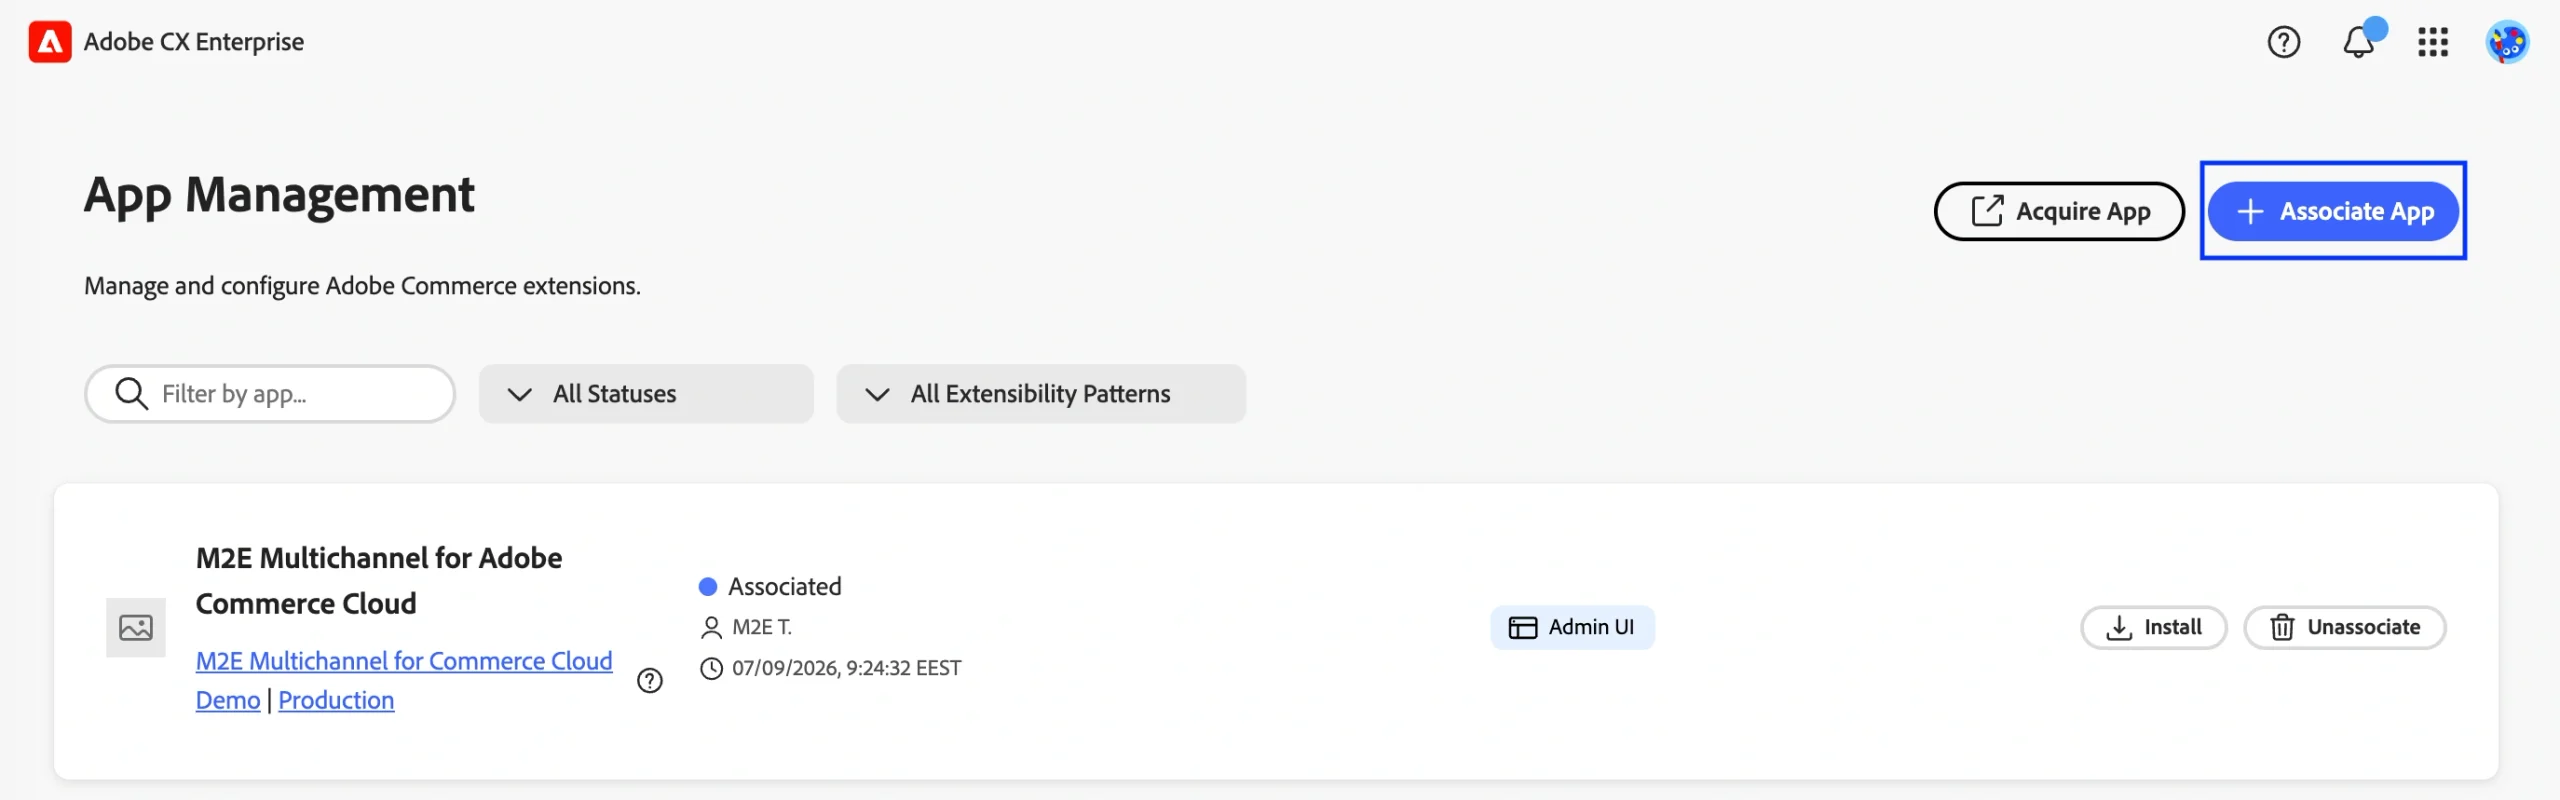
4) Select the required Project.
5) Select the corresponding Workspace.
6) Click Associate.
Once the association is complete, M2E Multichannel will appear in App Management with the Associated status.
Step 8. Install M2E Multichannel #
1) Find M2E Multichannel for Adobe Commerce Cloud in App Management.
2) Click Install.
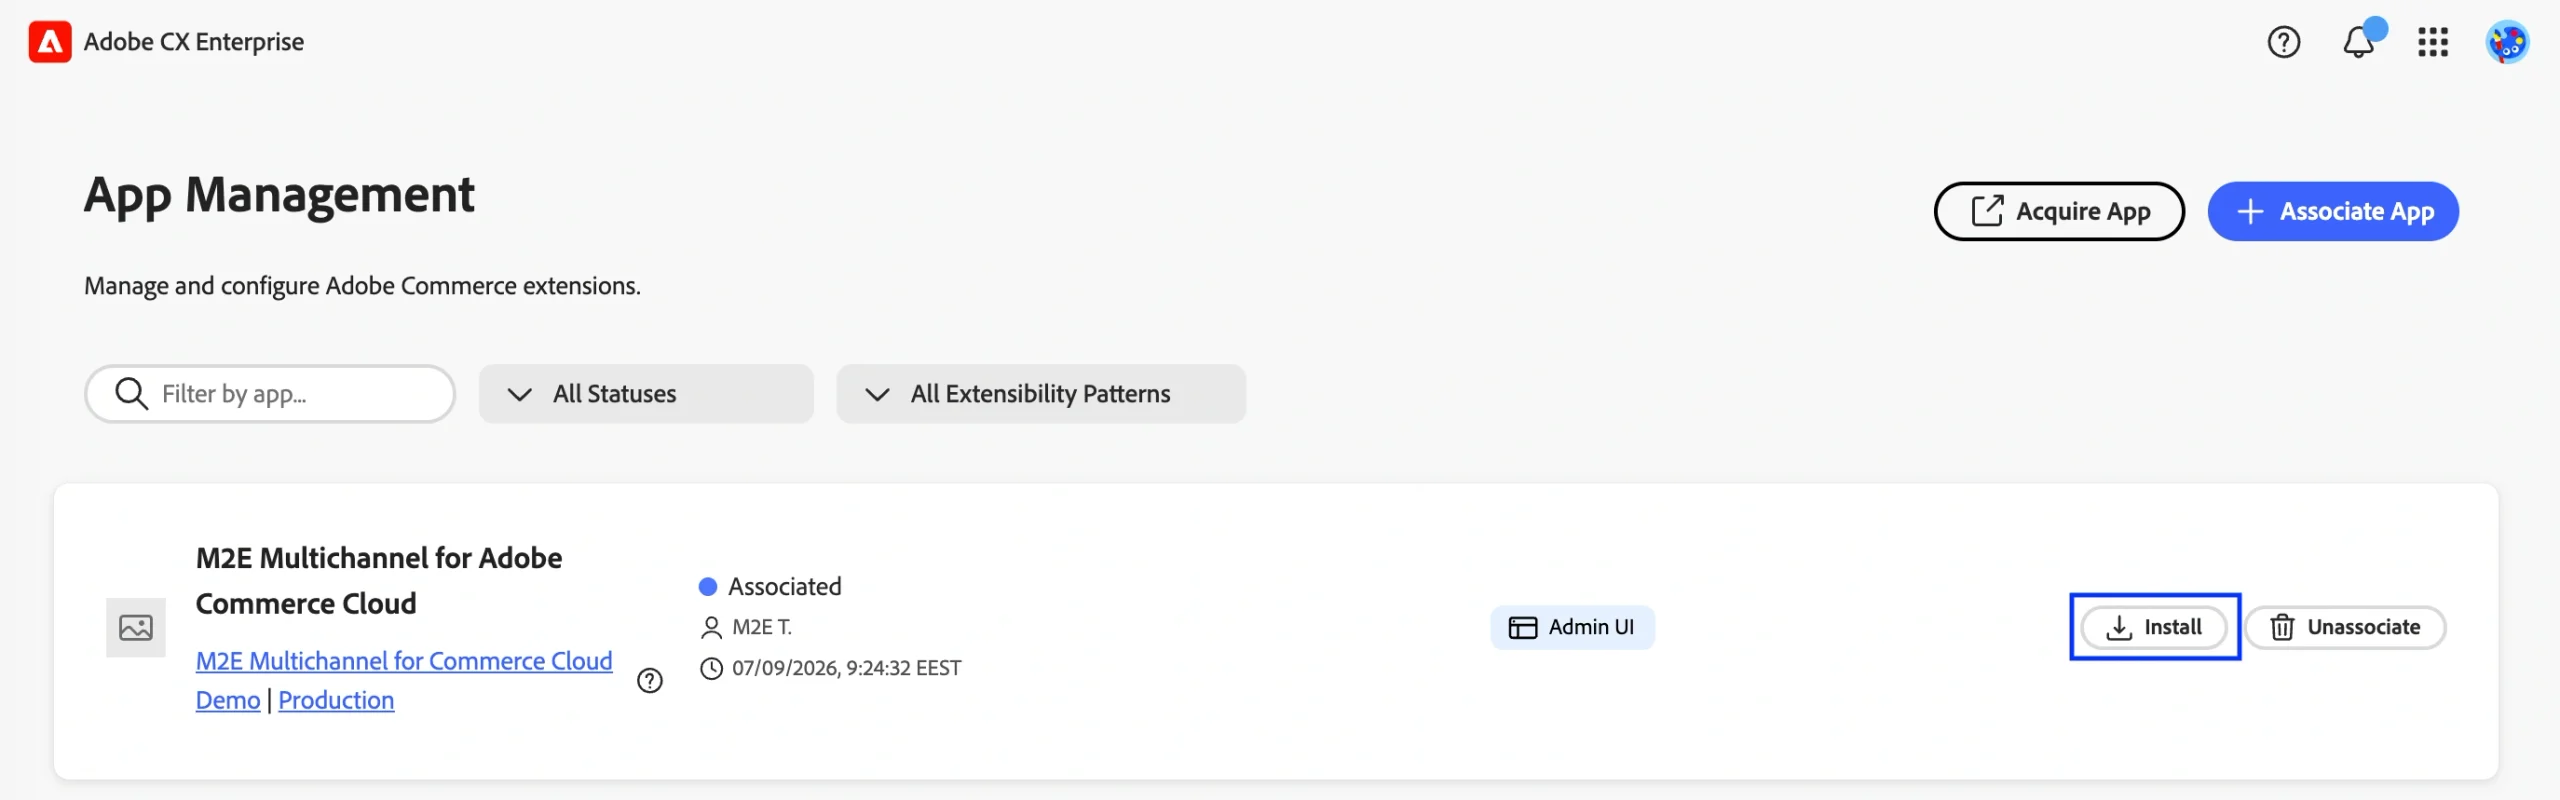
3) Confirm the action by clicking Install again.
4) The installation progress window will open. During installation, App Management:
- enables the Admin UI SDK and registers the extension with Adobe Commerce Admin UI;
- runs the Initialize M2E account custom installation step, which sends the data required to initialize the M2E account.
5) No action is required while these steps are running. Keep the page open until the installation is complete.
Once done, the app will show the Installed status in App Management.
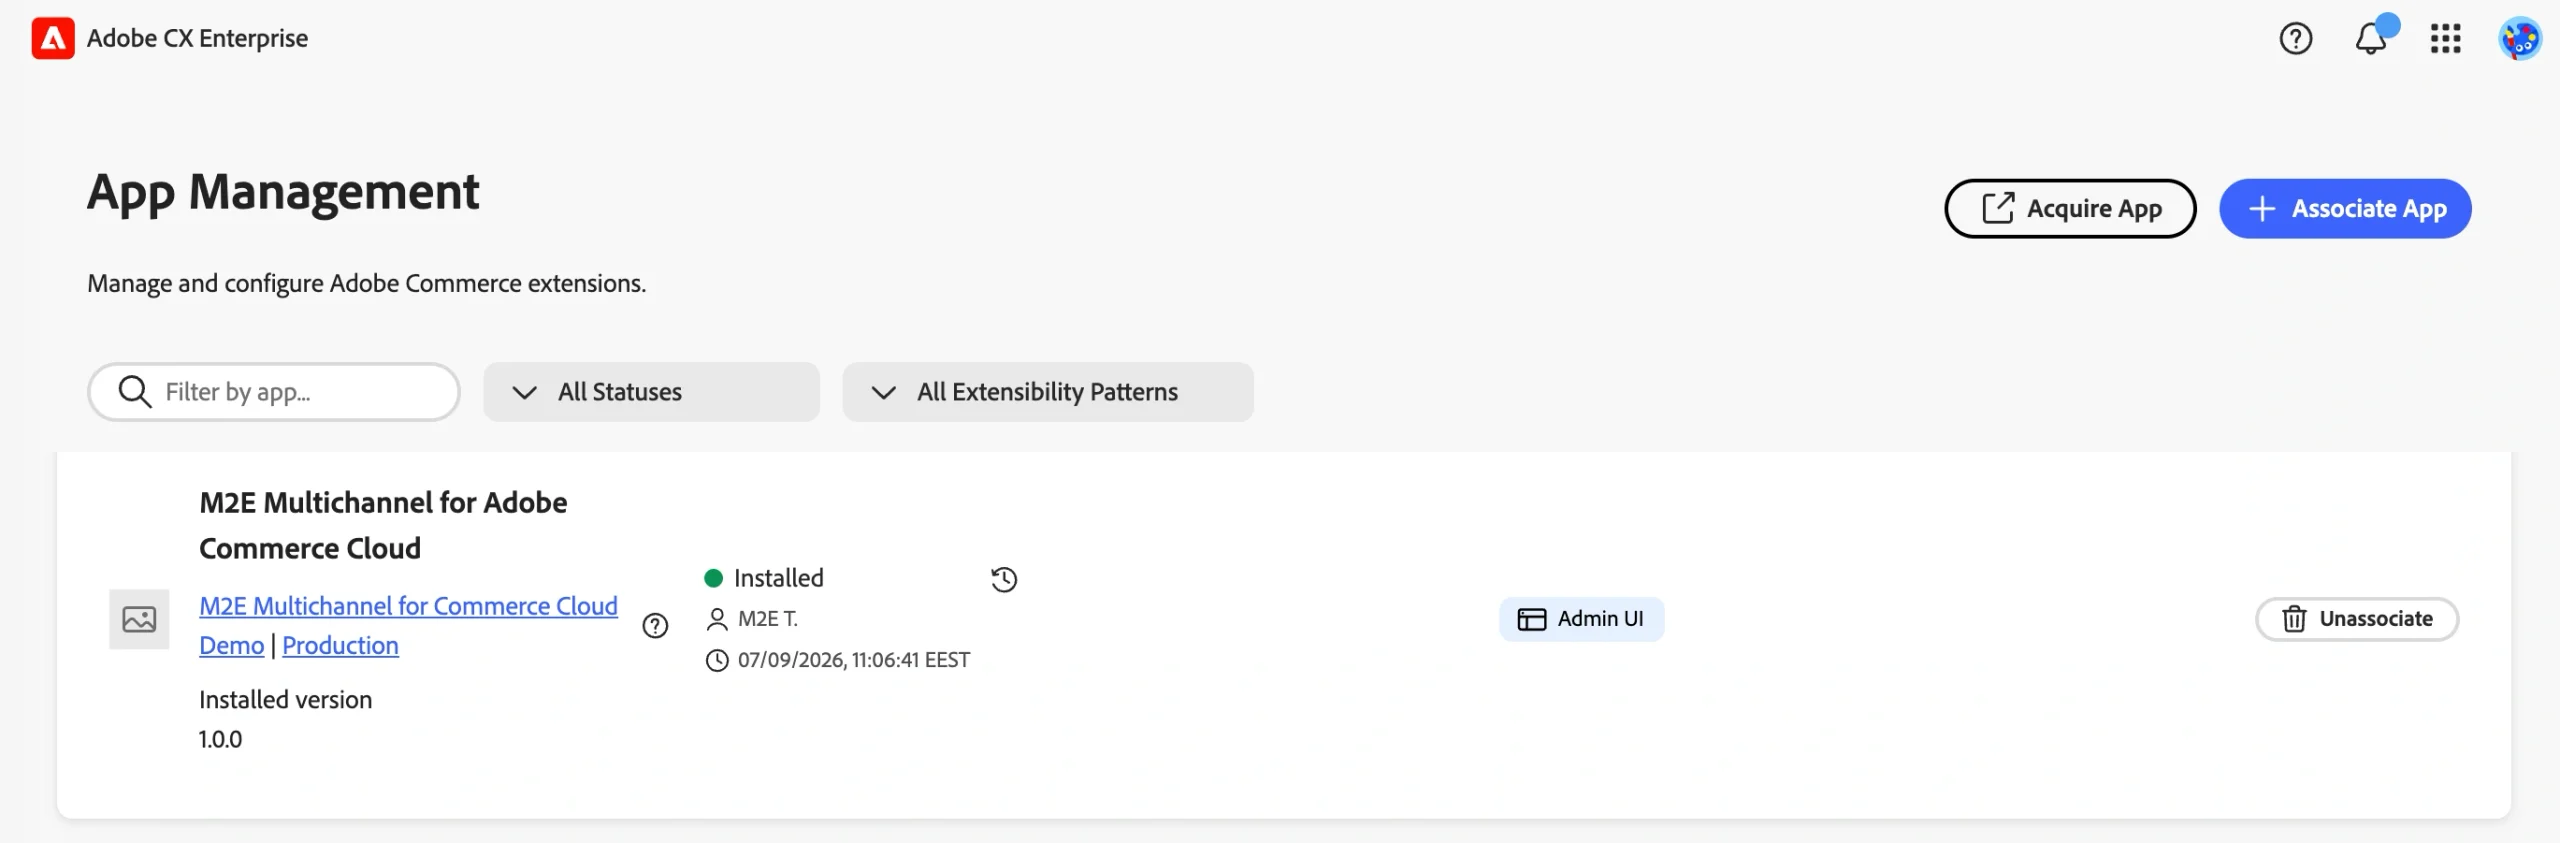
M2E Multichannel will become available under Apps in Adobe Commerce Admin. You can open the app and continue with the initial setup described in the M2E Multichannel User Guide.

Need help? #
If you have questions or need assistance installing M2E Multichannel, contact the support team.


