If you sell items with different options, like a T-shirt in several colors or sizes, in your Adobe Commerce (Magento) store, you can list them on Temu as one product with variations. This is possible through Magento Configurable Products and is fully supported by M2E Connect.
A Configurable Product combines several Simple Products under one listing. This way, customers can select variations (such as size or color) from drop-down menus on the product page. On Temu, your variation listing will appear similarly.
Follow this guide to list Magento Configurable products on Temu via M2E Connect.
Step 1. Create a Listing for Configurable Products #
We recommend creating a separate M2E Temu Listing for your Configurable Products. Keeping variation listings separate from your regular (Simple) products gives you better control and simplifies management.
To do this, go to Listings > Items > Add Listing, and follow the prompts to set up a new Temu Listing.
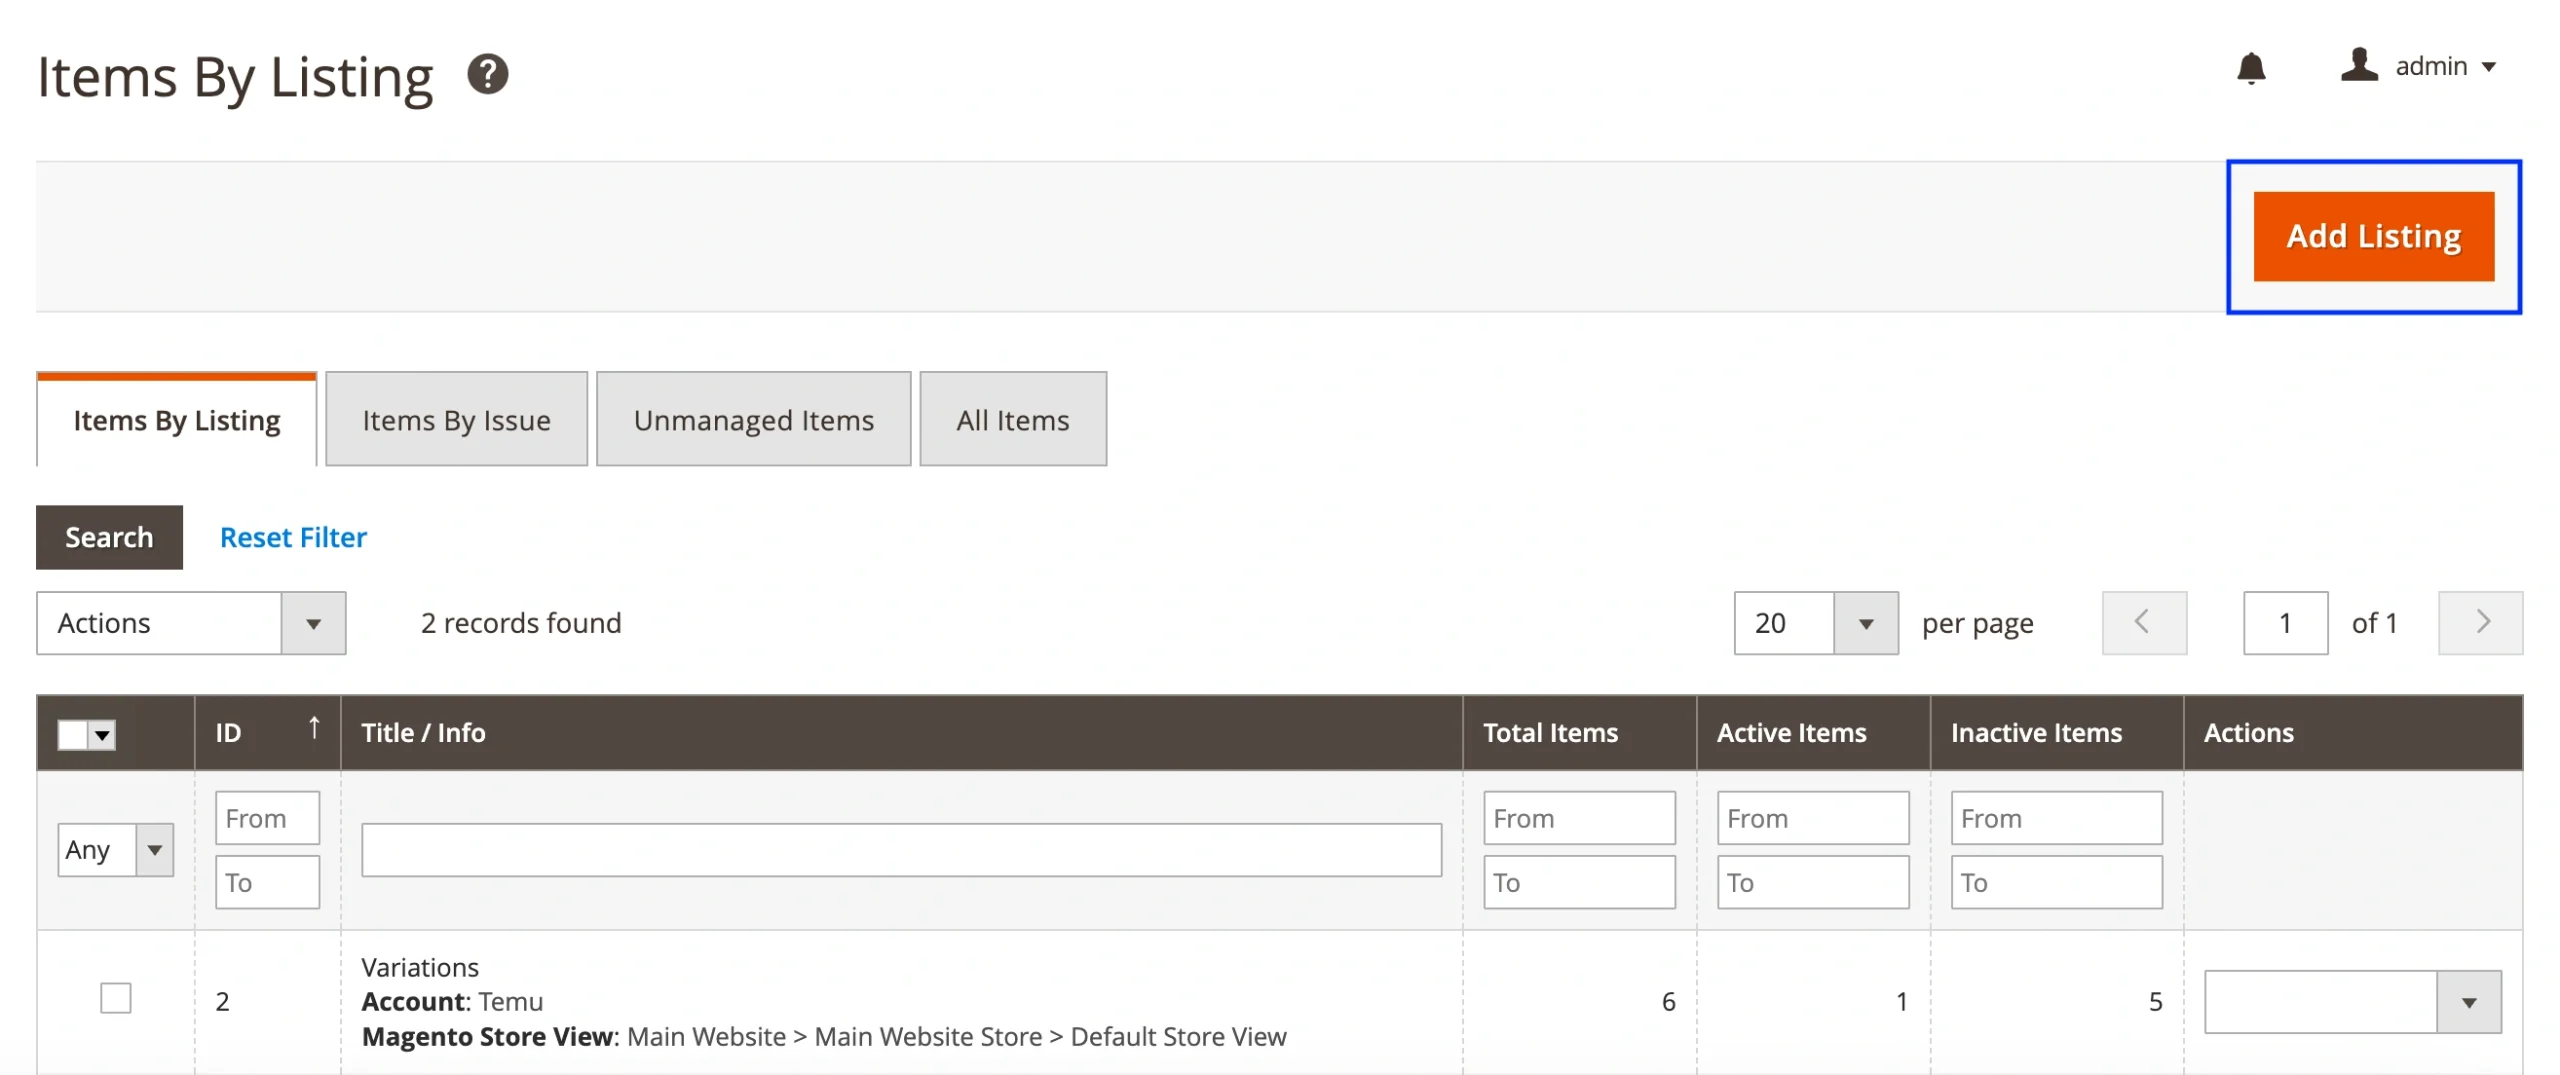
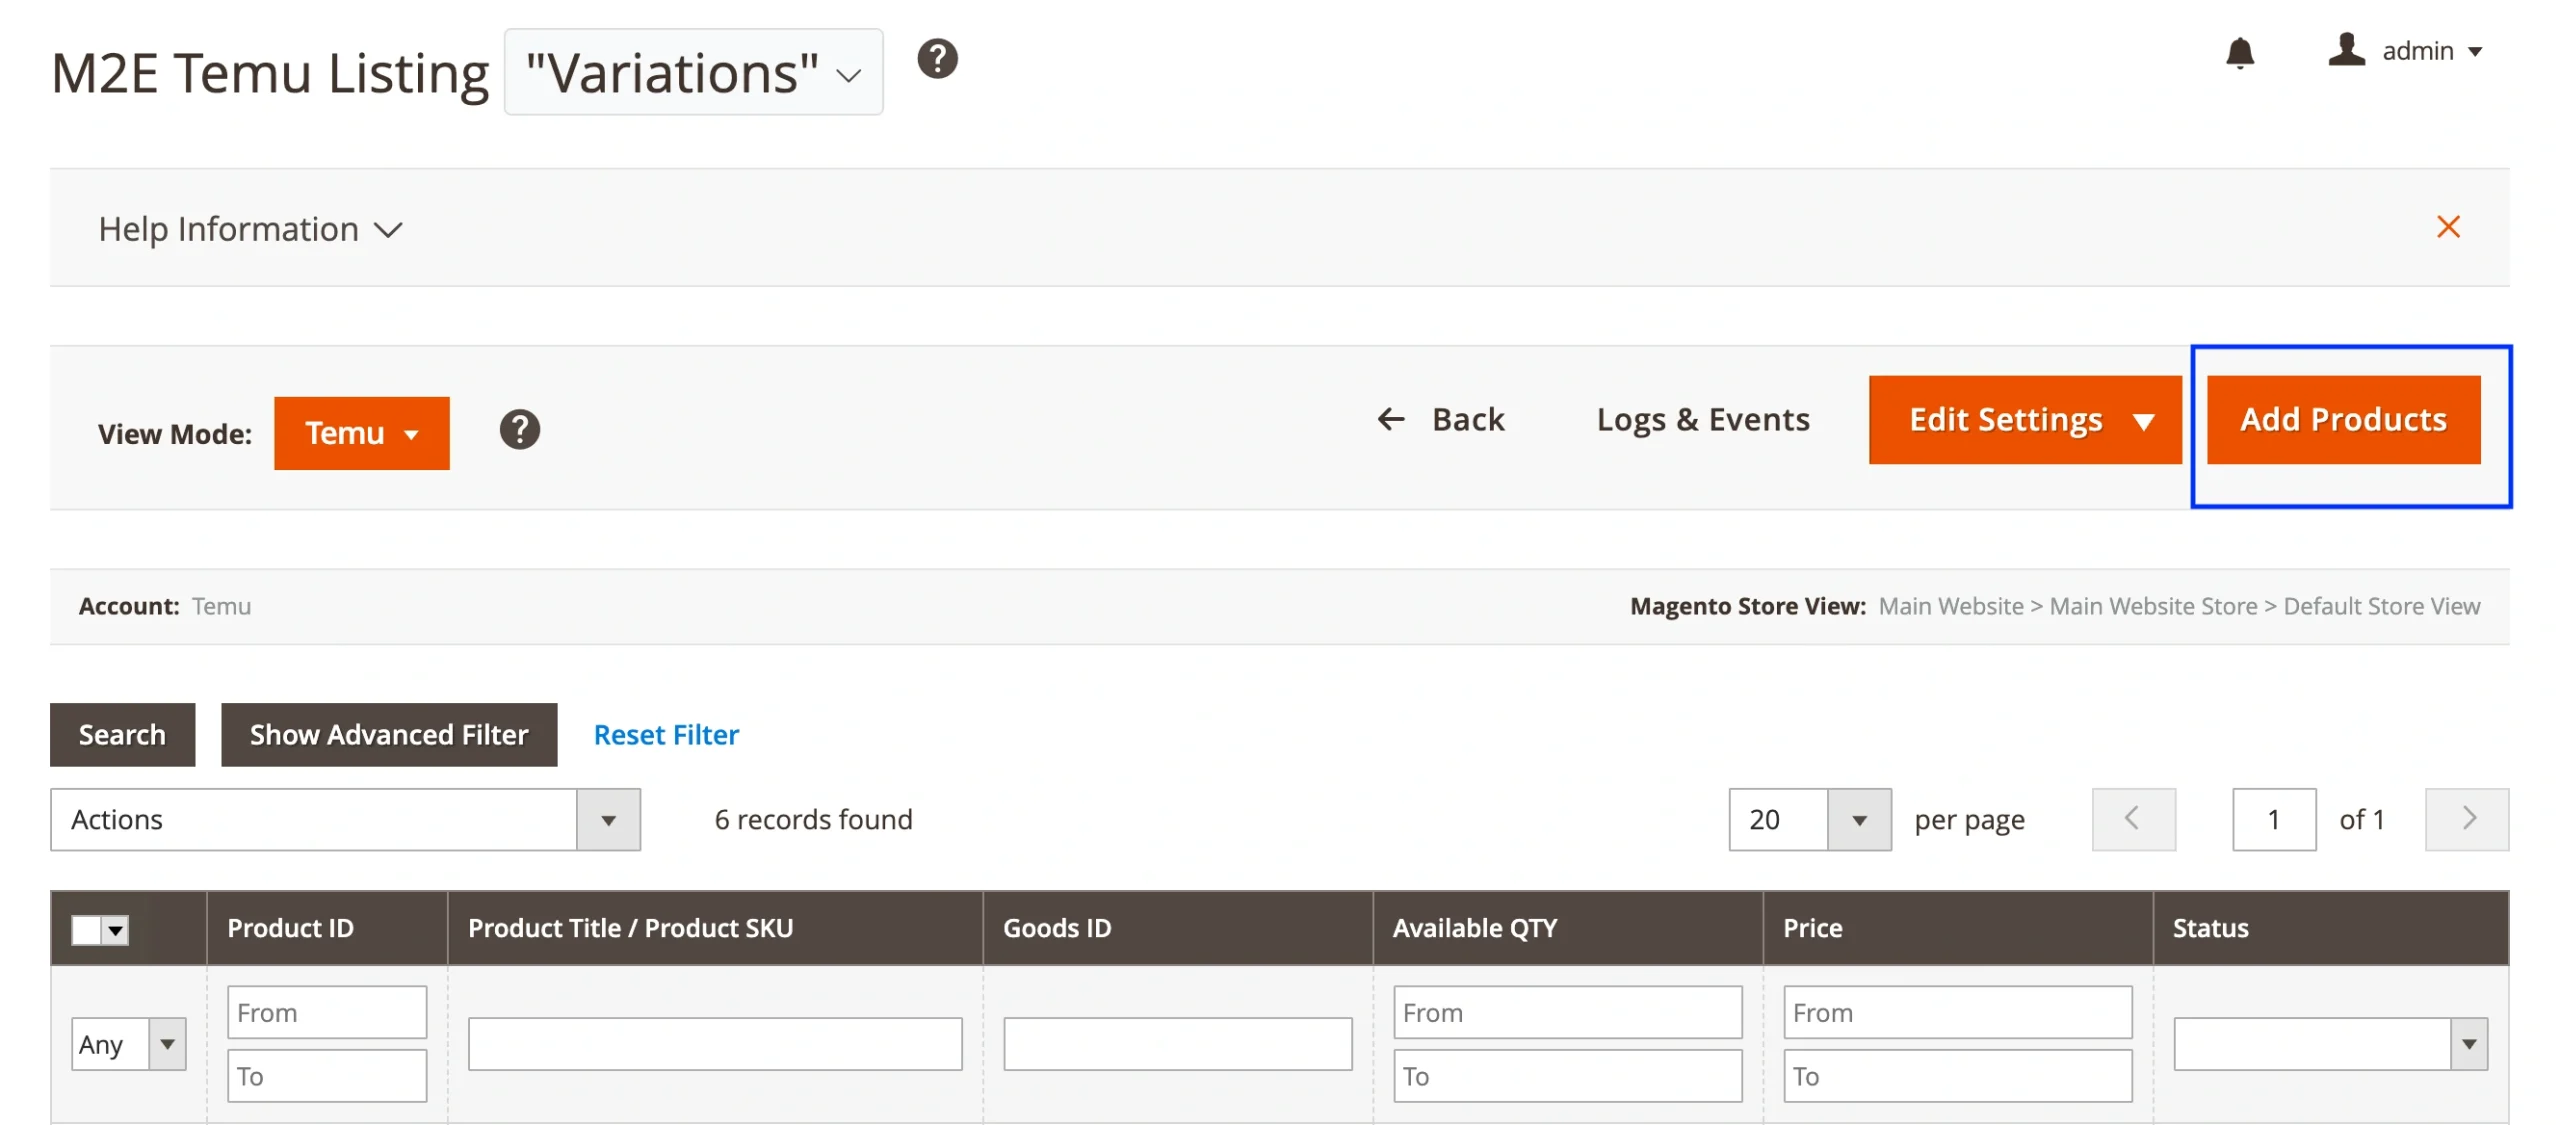
If you already have an M2E Temu Listing created, you can add Configurable Products to it. Go to Listings > Items, open the existing Listing, and click Add Products.
Step 2. Choose how to display products for selection #
When adding products to your M2E Temu Listing, choose how you want to view them:
- Products List – Displays all products in a single flat list. Use this if you prefer direct access to your catalog without category grouping.
- Categories – Groups products by your Magento Categories. This is useful if your catalog is large or organized by product types (e.g., Clothing > Shirts > T-Shirts).
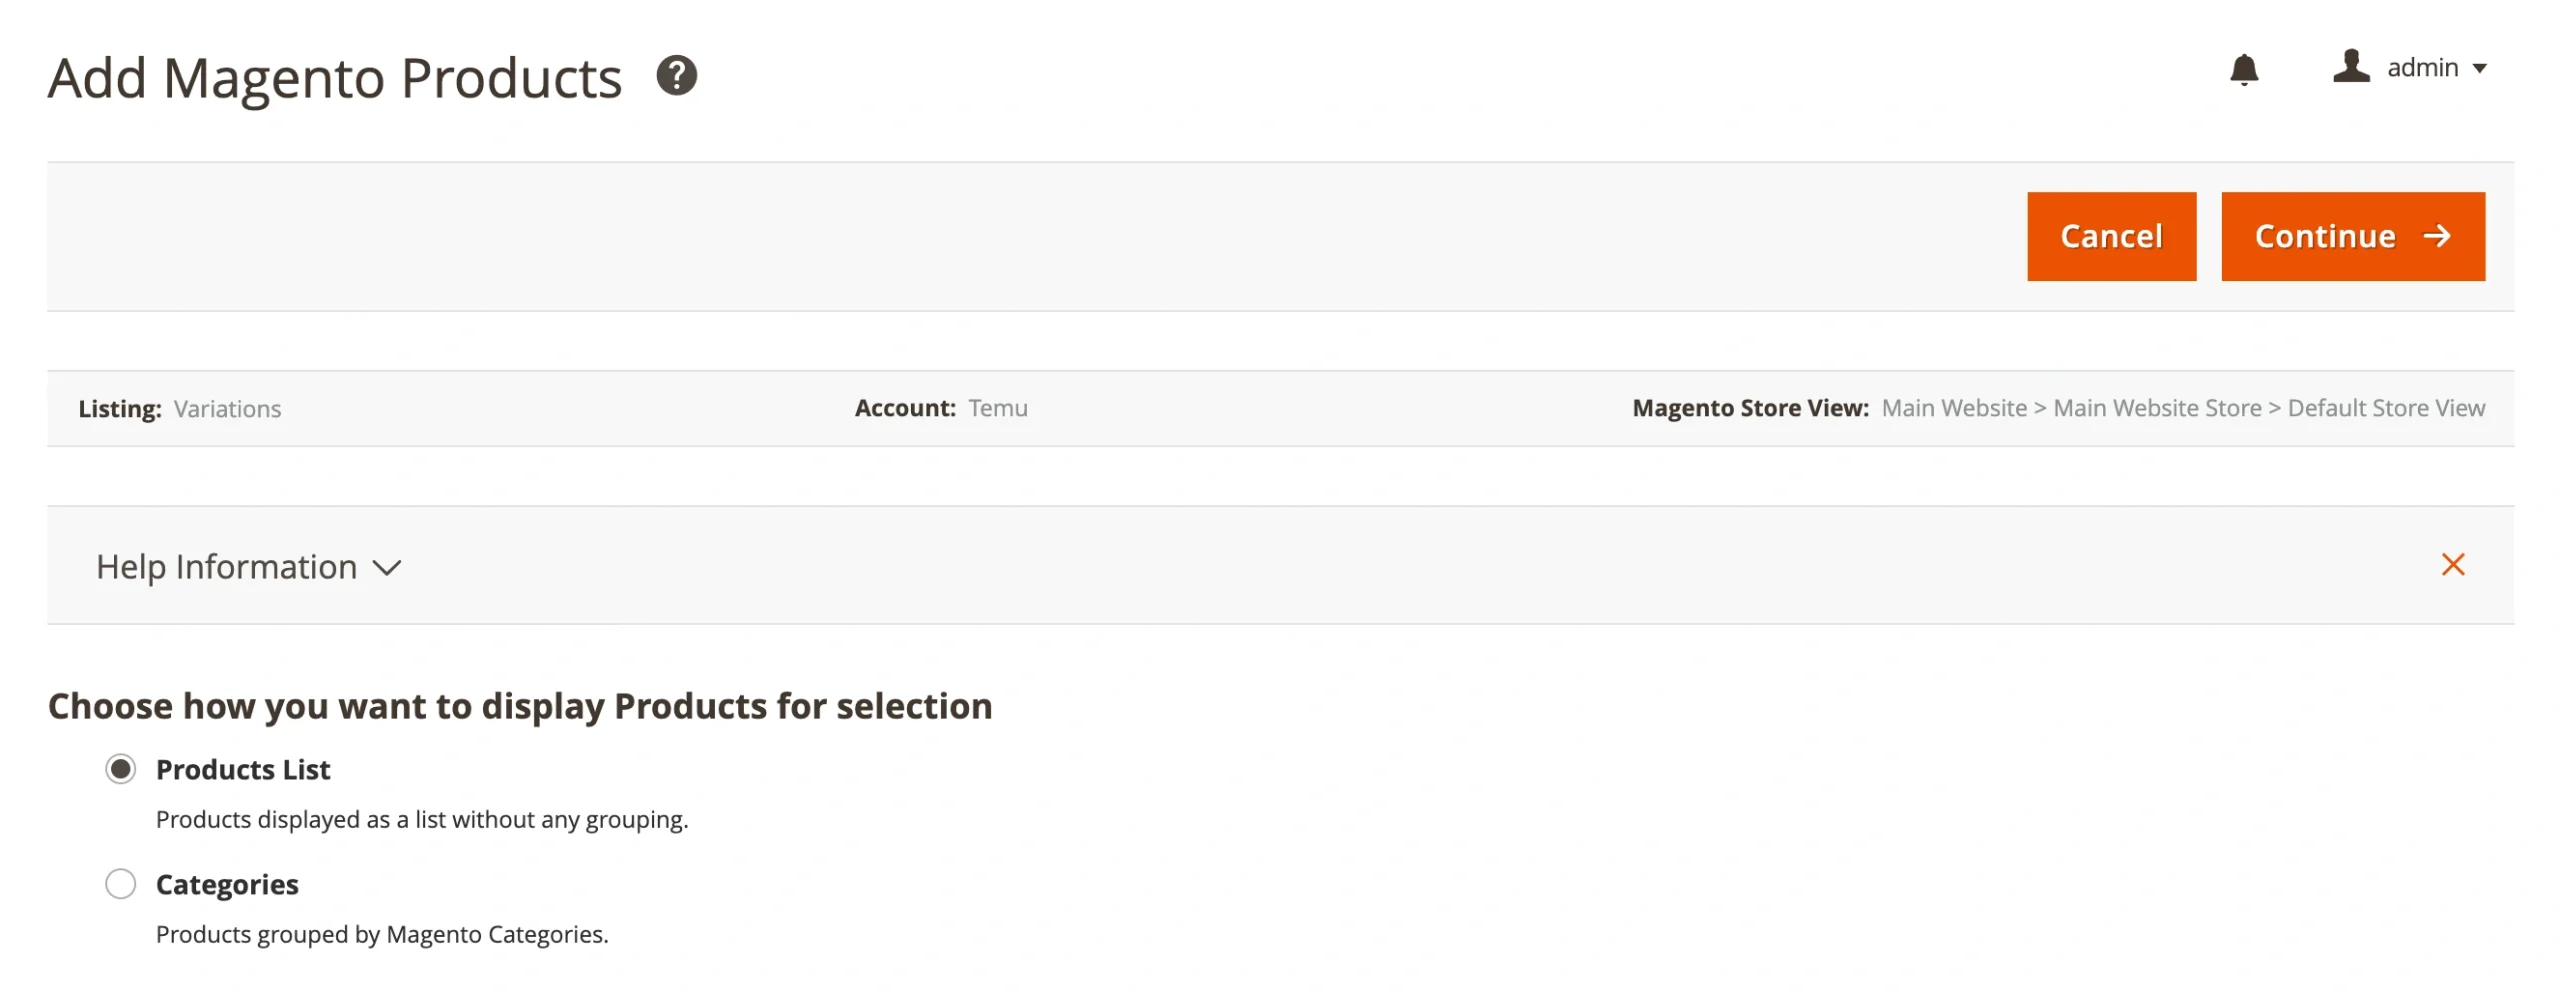
Once selected, click Continue to proceed.
Step 3. Select Configurable Products #
Choose the Configurable Products you want to list on Temu.
Use filters to narrow down your catalog, for example, filter by product type to show only Configurable Products, or apply the Advanced Filter for more precise selection.
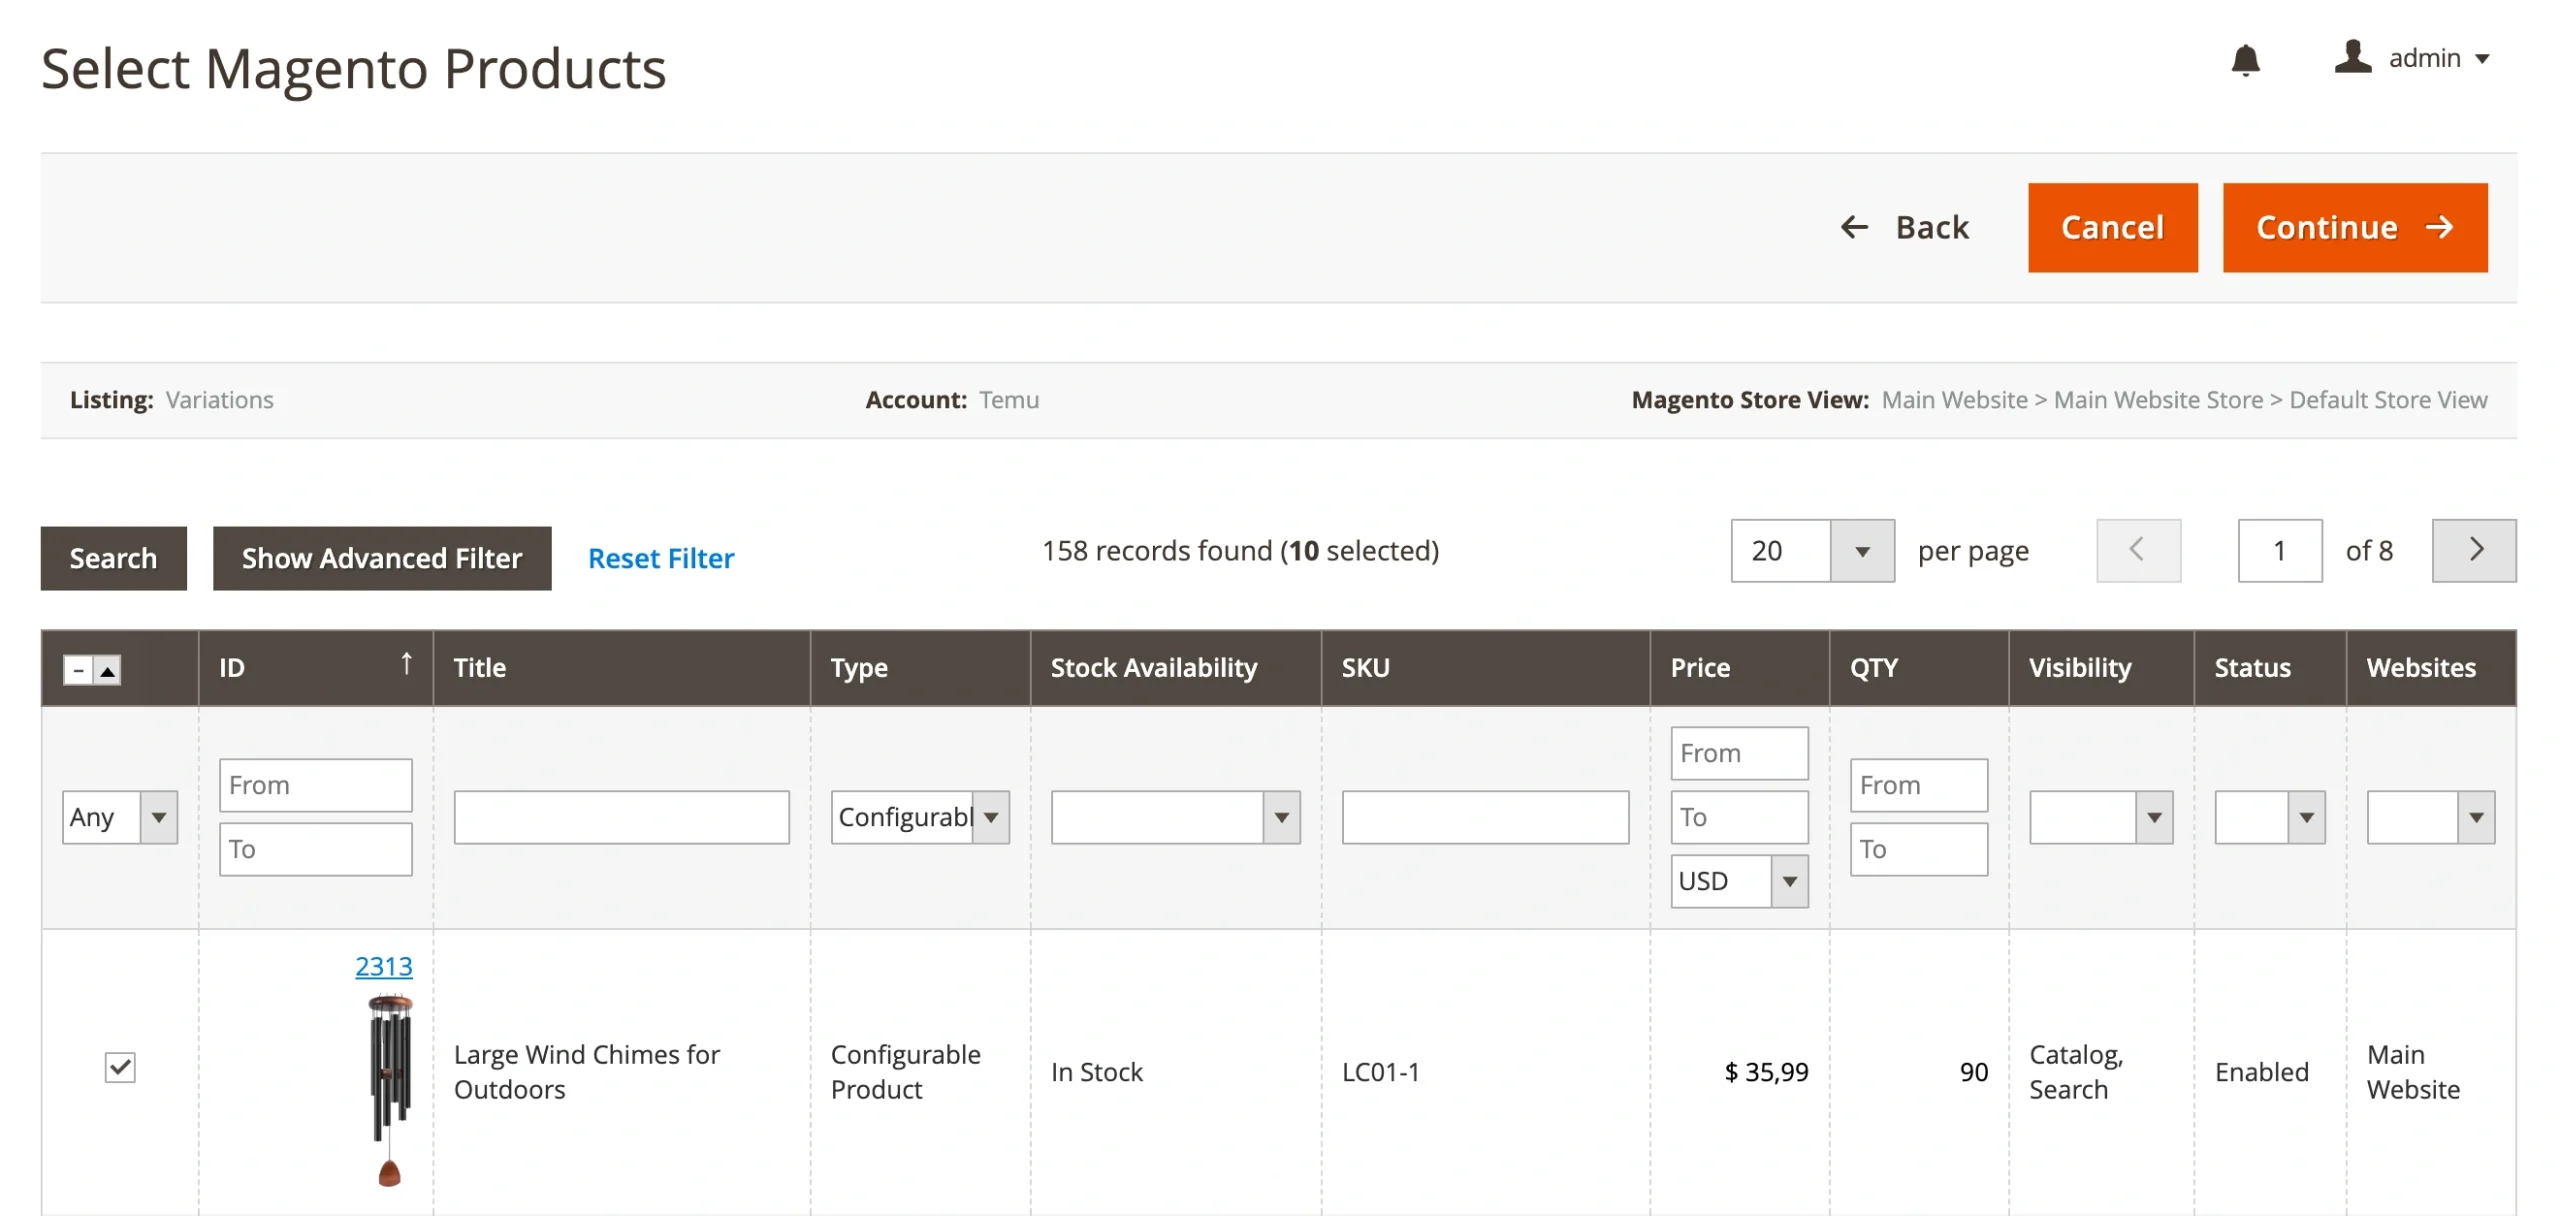
Click Continue when done.
Step 4. Assign Temu categories #
Before your products can go live on Temu, each one must be assigned to a specific Temu Category.
Choose one of the following methods for assigning categories:
- All Products same Category
Apply a single Temu Category to all selected products. Use this option if your items belong to the same category (e.g., T-shirts in different styles or colors).
- Set Manually for Each Product
Assign a Temu Category to each product (or group of products) individually. Ideal for Listings that include items from different categories.
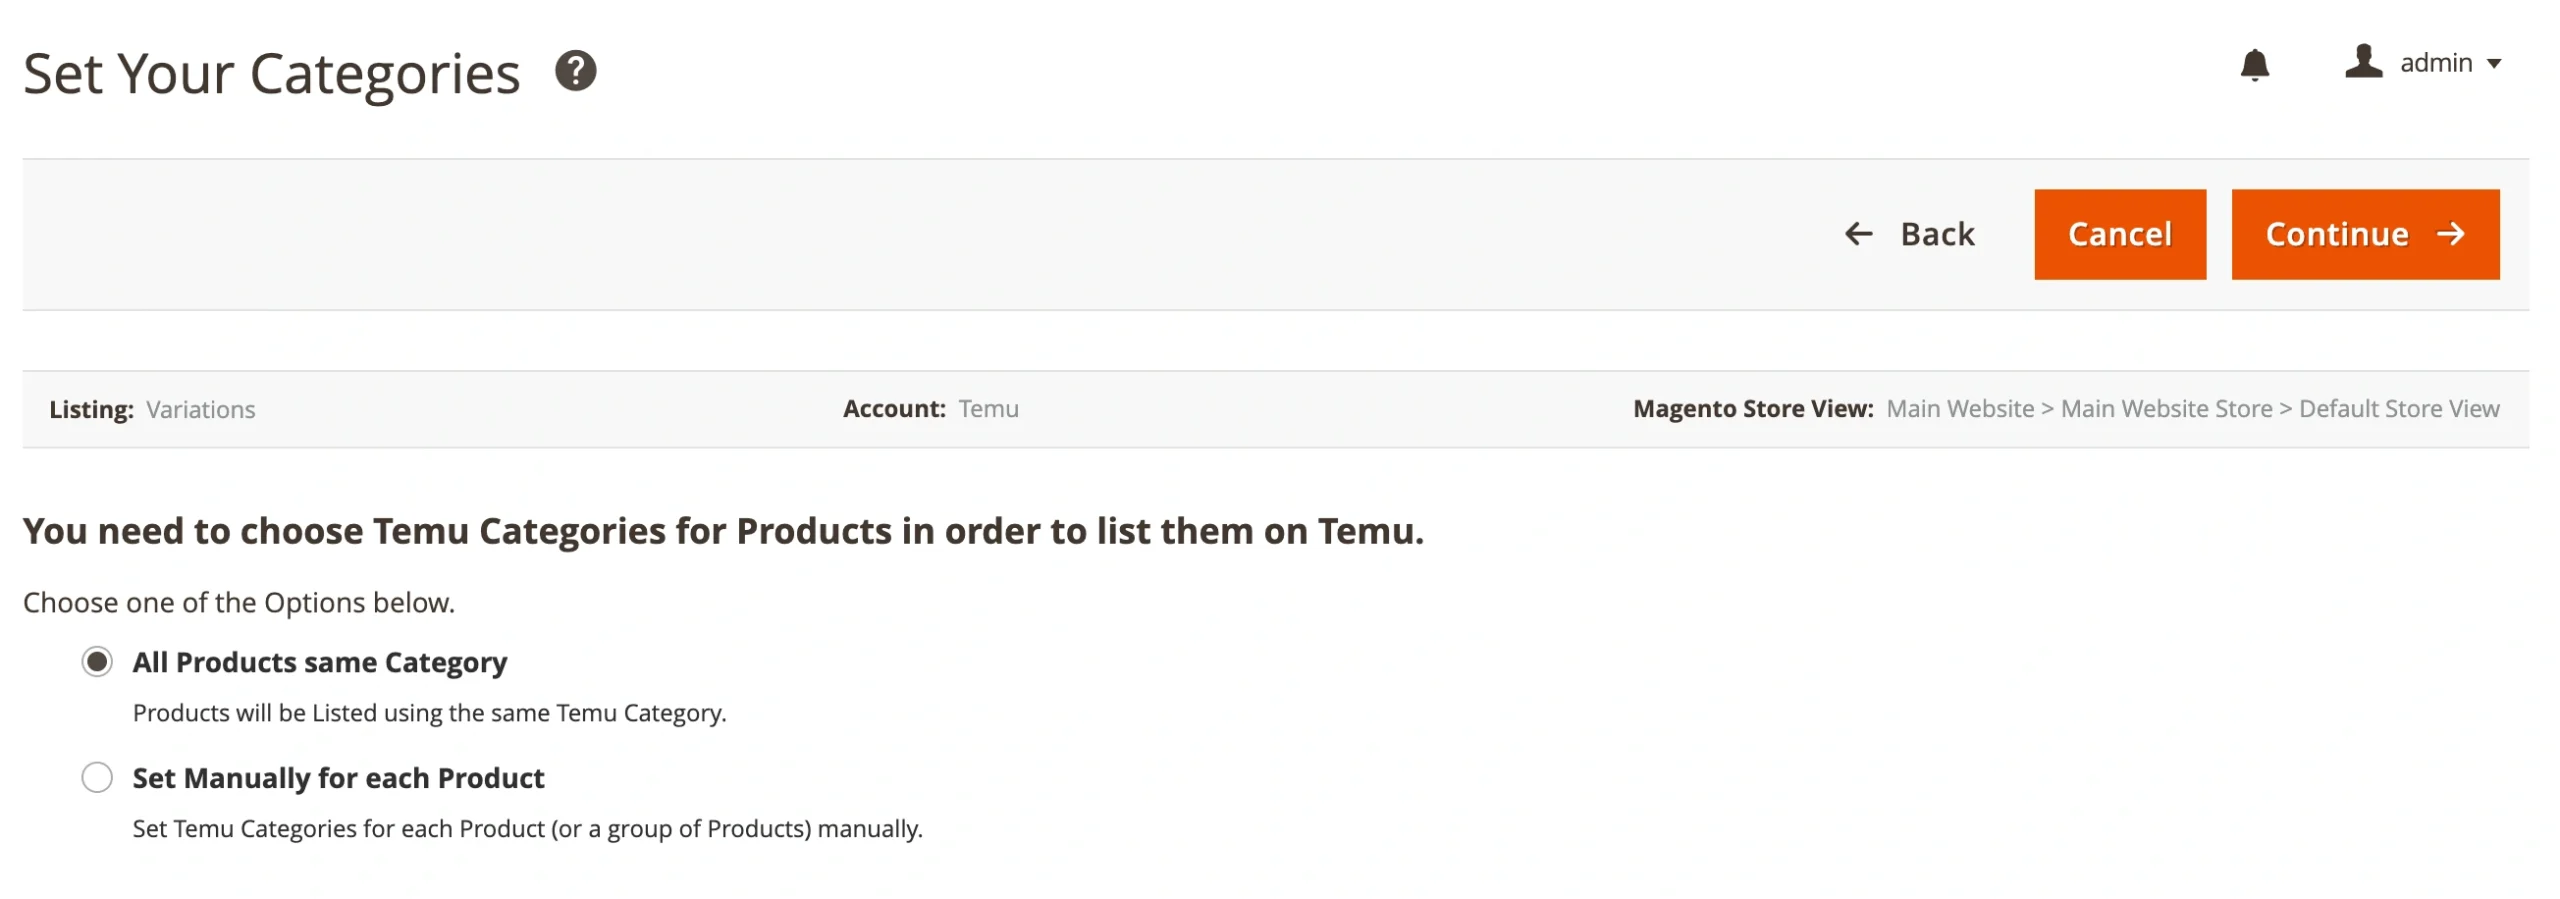
Click Continue to proceed.
Step 5. Choose a Temu category and map attributes #
After selecting how to assign categories, it’s time to set them up for each product.
1) Choose a Temu Category
Click Edit / Edit Category depending on the method you selected in Step 4.
In the pop-up window, you can:
- Select from previously saved categories
- Browse through the full Temu category tree
- Search by keyword or Category ID

Once you've selected the Temu category, confirm your choice.
2) Map Attributes
After assigning a category, you’ll need to configure two types of attributes: Variation Attributes and Category Attributes.
Variation Attributes define how the product varies (e.g., Color, Size, Material).
⚠️ Most Temu categories require at least one variation attribute to define a product option.
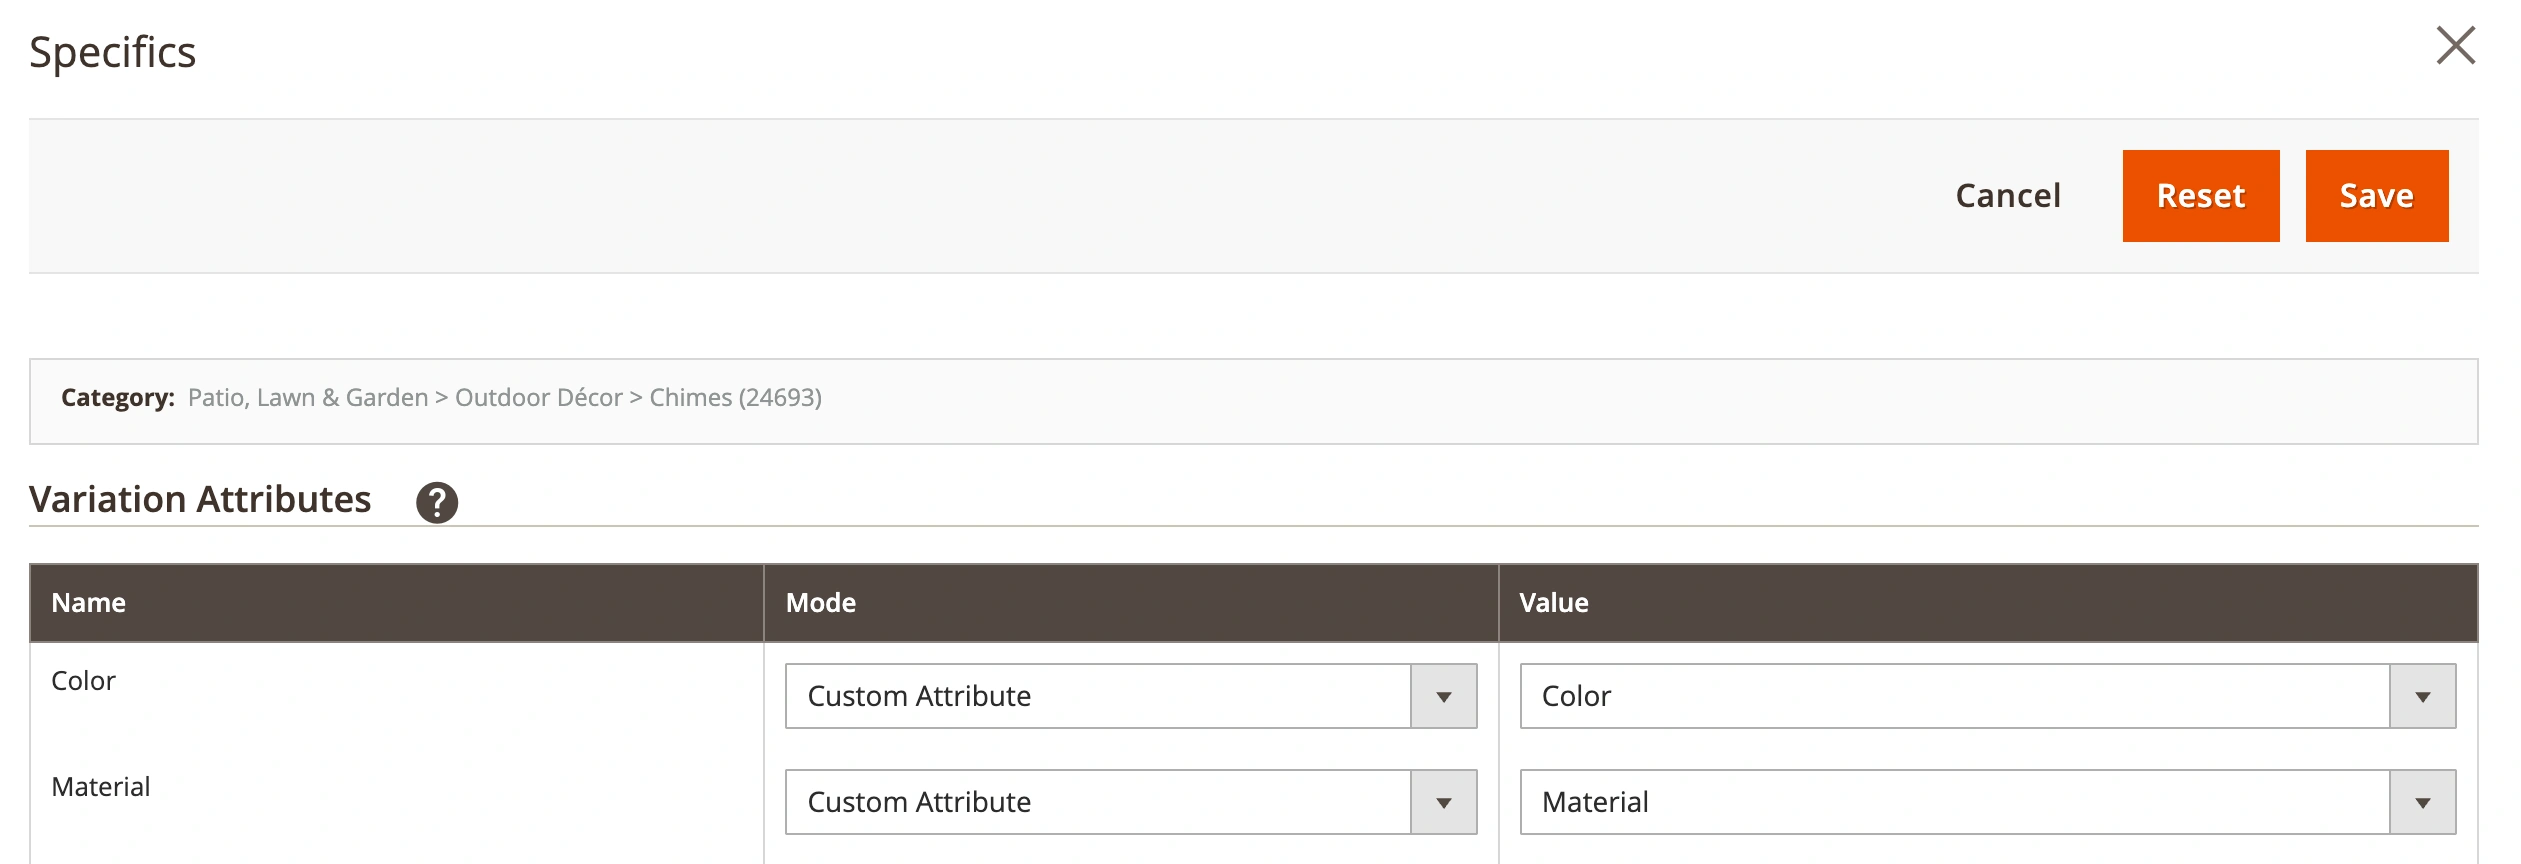
To provide the variation attribute, you can either:
- Choose Custom Attribute if your Magento Configurable Product already uses this variation (e.g., Size or Color).
- Choose Custom Value if the variation is the same across all items or is not stored as a Magento attribute.
ℹ️ M2E Connect will automatically match the Magento Variation Attribute Labels from your Configurable Product.
If you’ve selected Temu variation attributes that don’t match how your Magento product varies, M2E will instead use the variation attributes from your Magento product.
Category Attributes define additional details specific to the selected Temu category.
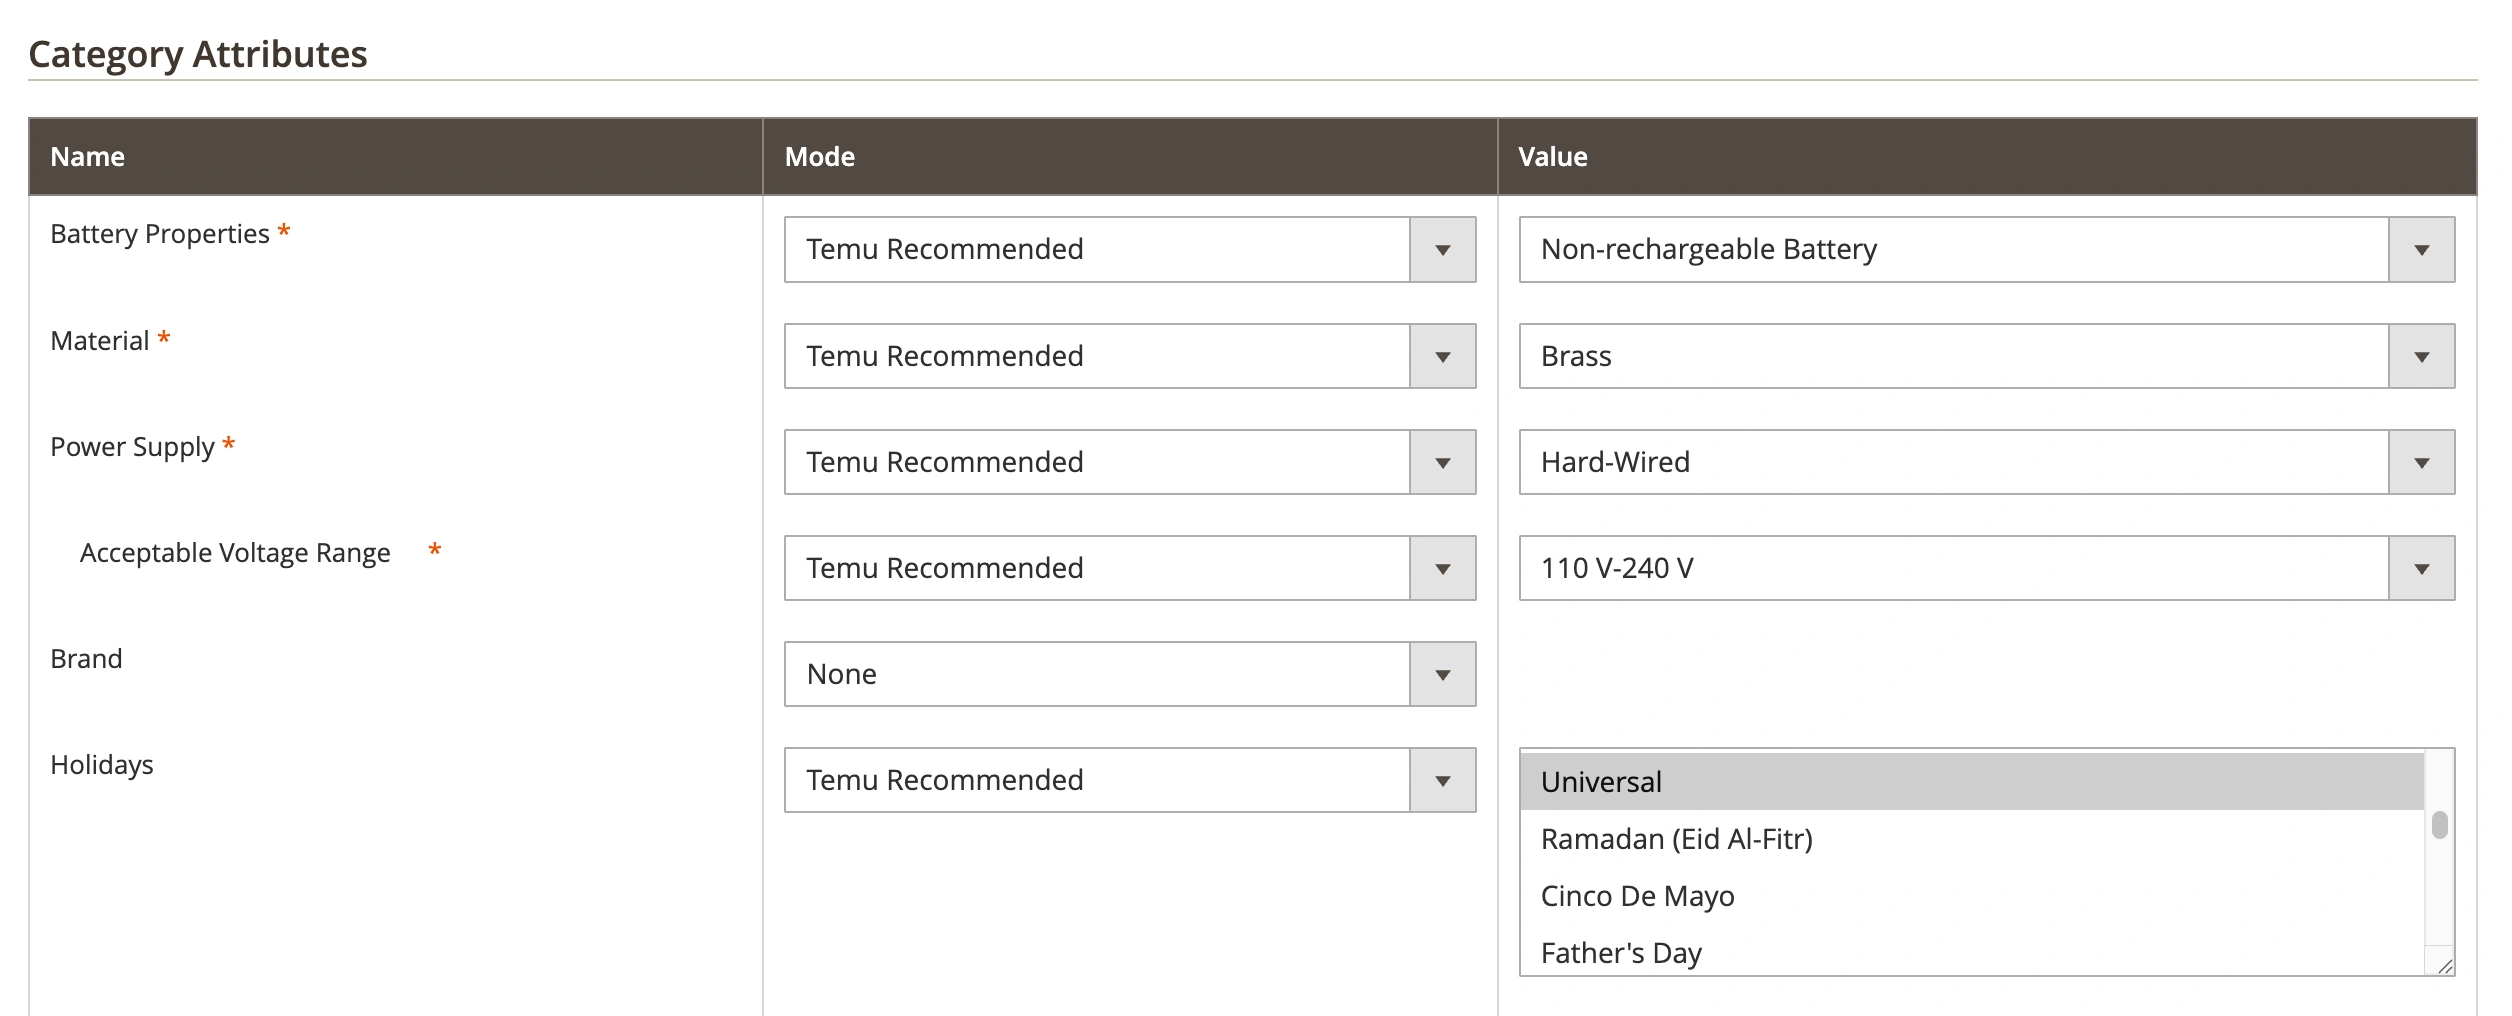
For each attribute, you can select a Mode:
- Temu Recommended – Use default values suggested by Temu.
- Custom Attribute – Pulls values from a Magento attribute.
- Custom Value – Enter a fixed value manually.
Then choose or enter the corresponding Value in the right column. Once the attributes are filled in, click Save.
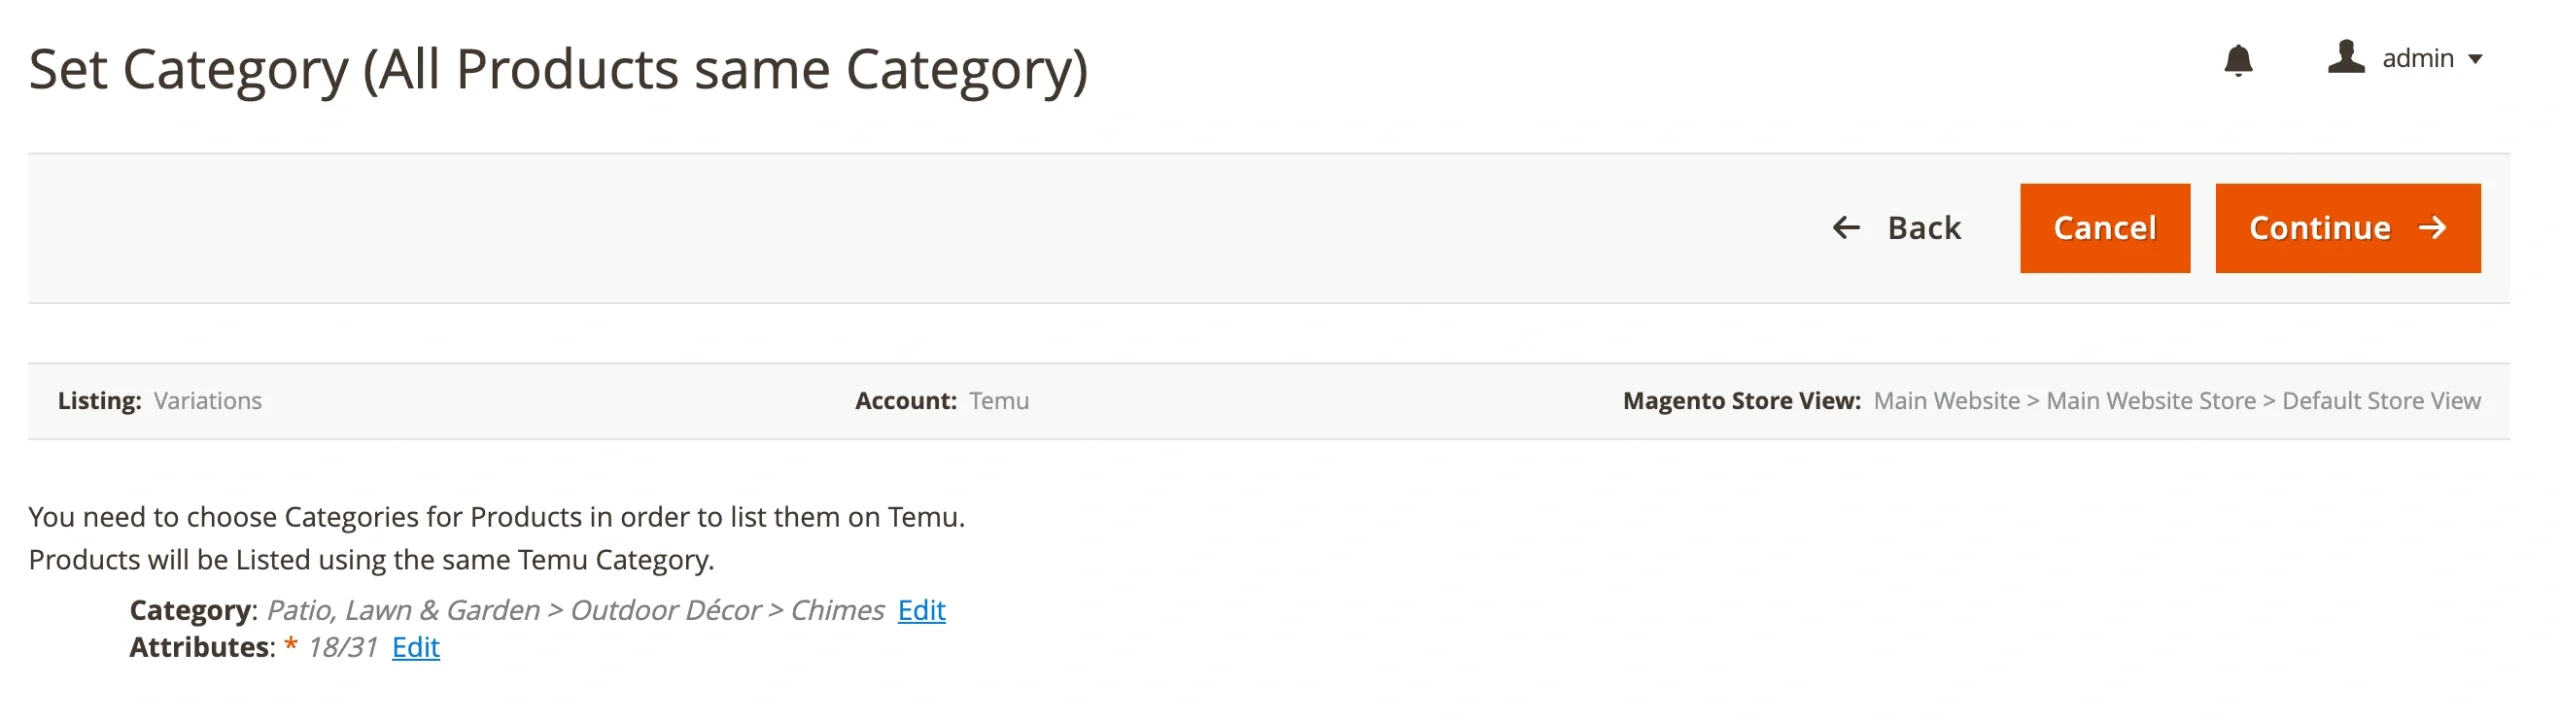
If you’ve completed the category and attribute setup, click Continue to proceed to the final step.
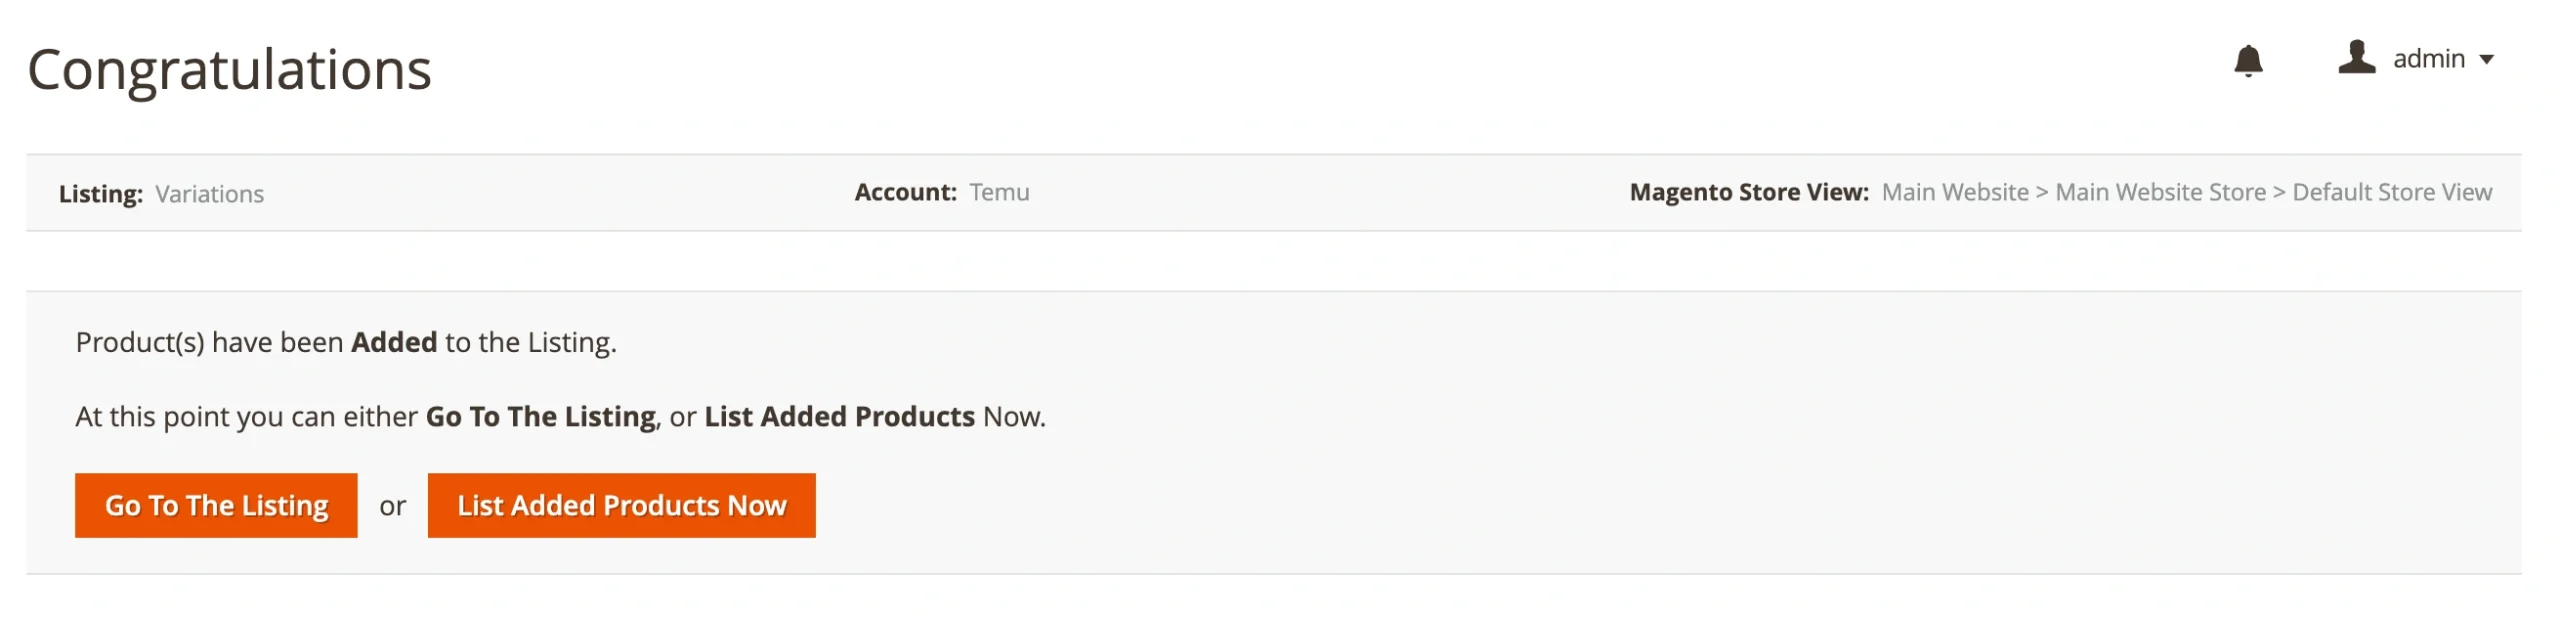
Step 6. List products on Temu #
Once all required settings are complete, you’re ready to publish your products. Click List Added Products Now to submit your items to Temu’s approval. Or click Go To The Listing if you’d prefer to review the products and submit them later.
ℹ️ Temu will review listings before they go live. You can track the status of each product from your M2E Temu Listing.
Manage variations #
After your products are listed, you can manage each variation in the M2E Temu Listing interface. For that, click Manage Variations next to the listed item:
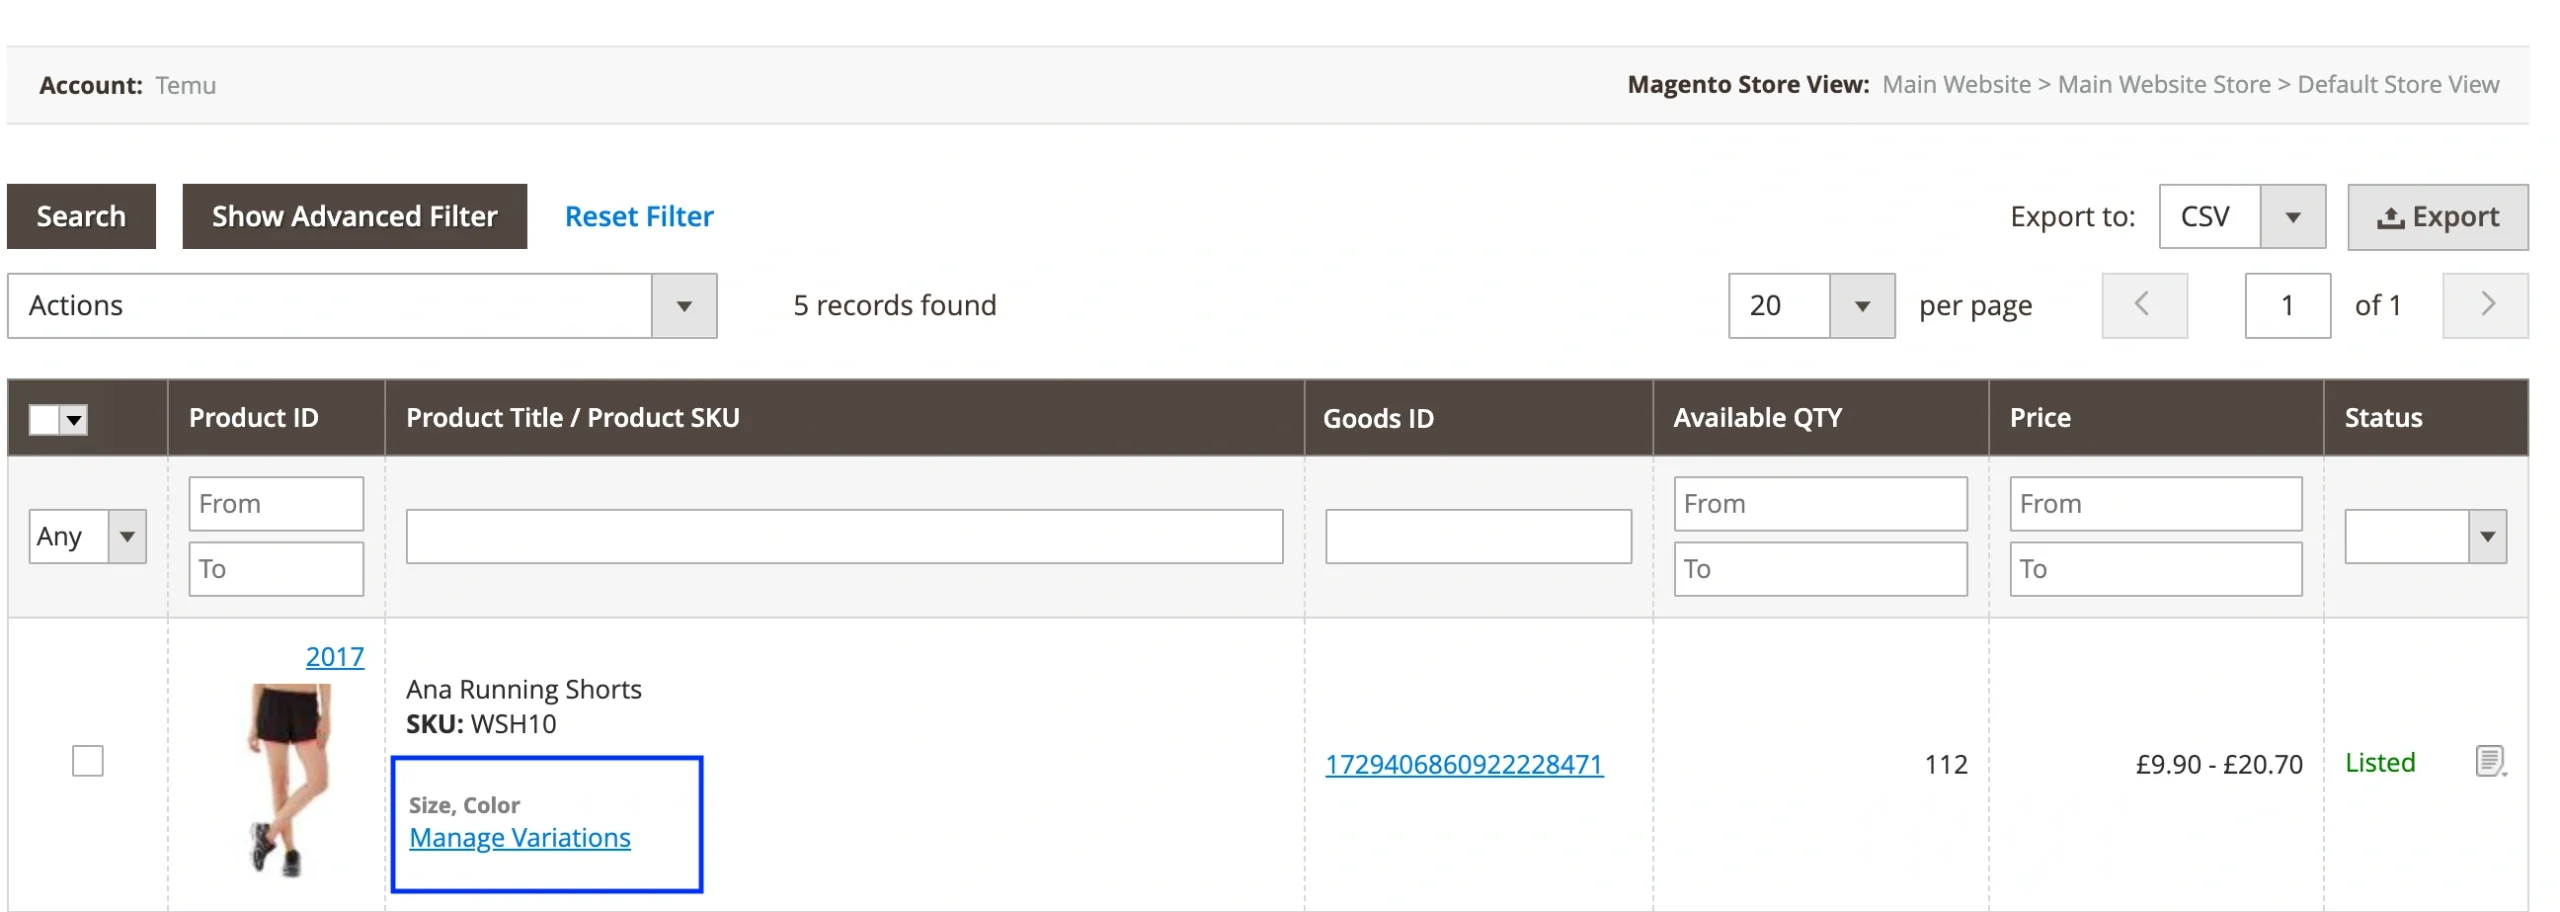
You can view and edit the price, quantity, and status for each variation, as well as use column filters to sort, search, and locate specific options.


